

Jenkins Pipelines as CI and Argo CD as CD for Kubernetes Deployments
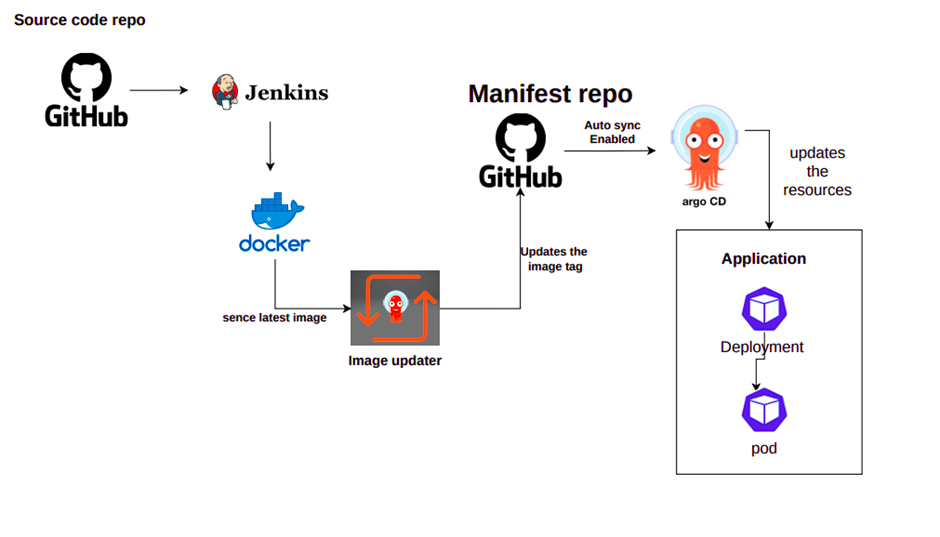
Tired of manually deploying apps to Kubernetes?
Let's say goodbye to tedious updates and hello to seamless automation with Jenkins pipelines and Argo CD! This dynamic duo powers up your CI/CD workflow, ensuring your apps fly onto Kubernetes flawlessly.
In this blog, you'll discover:
- How to harness the power of Jenkins pipelines for automated builds and tests.
- Why Argo CD's GitOps approach keeps your deployments consistent and reliable.
- Step-by-step guidance for setting up an end-to-end CI/CD pipeline in Kubernetes. ️
- Best practices and strategies to optimize your deployments and stay ahead of the game.
This blog post will discuss how to use Jenkins pipelines and Argo CD to implement continuous integration (CI) and continuous delivery (CD) for Kubernetes applications.
What is Jenkins Pipeline
Jenkins Pipelines is a plugin for Jenkins that allows you to define and manage CI/CD pipelines as code. Jenkins Pipelines provides several features that make it easy to create complex and reliable CI/CD pipelines, including:
- Declarative pipeline syntax: - Jenkins Pipelines uses a declarative syntax to define pipelines, which makes them easy to read and maintain.
- Pipeline stages: - Jenkins Pipelines allows you to break down your pipeline into stages, which makes it easier to manage and troubleshoot.
- Parallel execution: - Jenkins Pipelines can execute stages in parallel, which can speed up your pipeline.
- Pipeline parameters: - Jenkins Pipelines allows you to pass parameters to your pipeline, which makes it more reusable and flexible.
What is ArgoCD
ArgoCD is a GitOps-based continuous delivery tool for Kubernetes applications. ArgoCD makes it easy to deploy and manage Kubernetes applications by using Git as the single source of truth for application configuration.
ArgoCD watches your Git repository for changes and automatically synchronizes the desired state of your application with the actual state in your Kubernetes cluster. This ensures that your application is always deployed in the state that is defined in your Git repository.
How to use Jenkins Pipelines and ArgoCD for CI/CD on Kubernetes
To use Jenkins Pipelines and ArgoCD for CI/CD on Kubernetes, you will need to setup below mentioned steps:
STEPS: -
1) Created a windows Server for Accessing Jenkins
-> Go to Compute Instance Page
-> Create Instance
-> Instance Name
-> Select the Zone
-> Select Machine type
-> Select the image as windows server
-> Specify the Disk Size
-> Give network tag
-> Select the Network & Subnetwork
-> Click Create
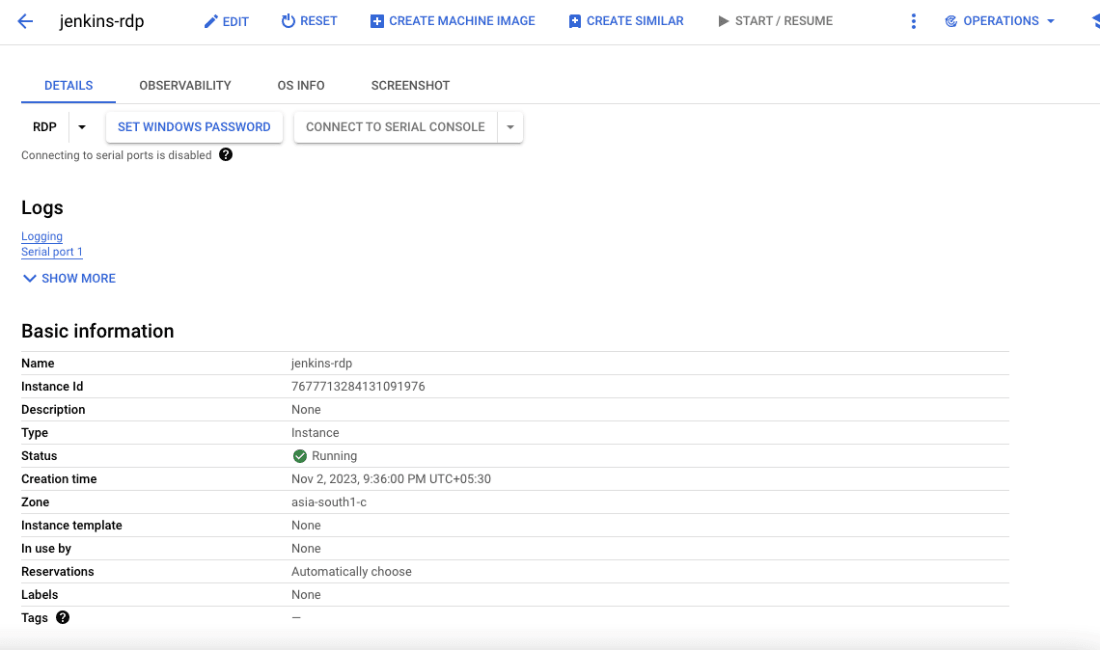
2) Create a Jenkins server where Jenkins is hosted. -> Go to Compute Instance Page
-> Create Instance -> Instance Name -> Select the Zone
-> Select Machine type
-> Select the image as windows server
-> Specify the Disk Size
-> Give network tag
-> Select the Network & Subnetwork
-> Click Create
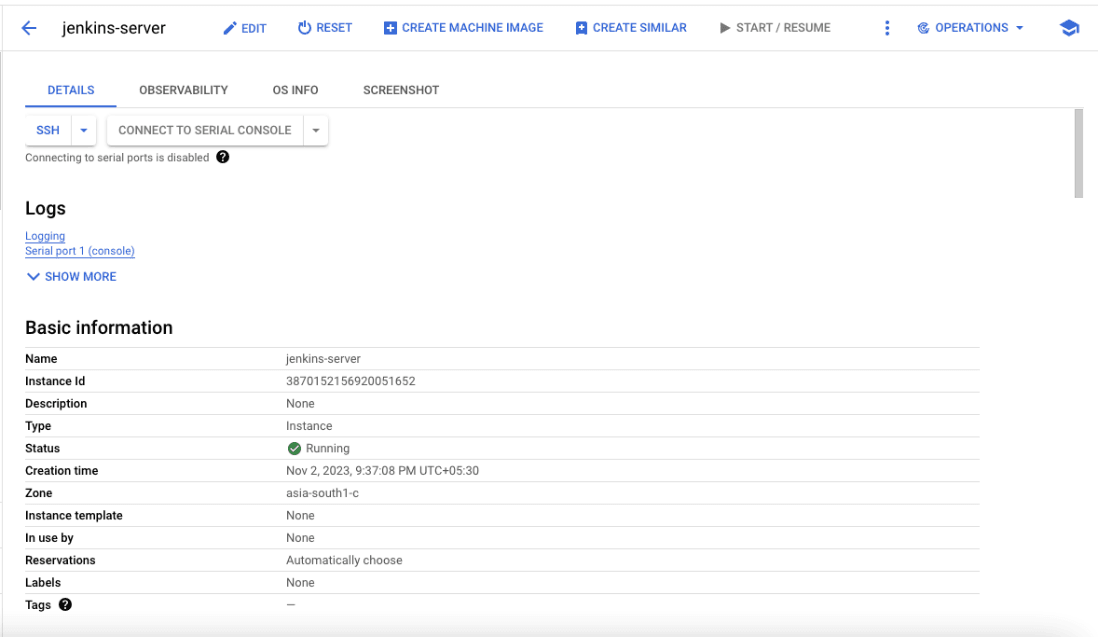
3) Login To windows server
4) Download putty putty download link
5) Open Putty Gen
6) We now need to generate the ssh keys, to be able to login from PuTTY, and add the keys to the VM, before creating the instance. Open PuTTYgen and click Generate. A random key will be generated when you move your mouse in the blank area under the “Key”
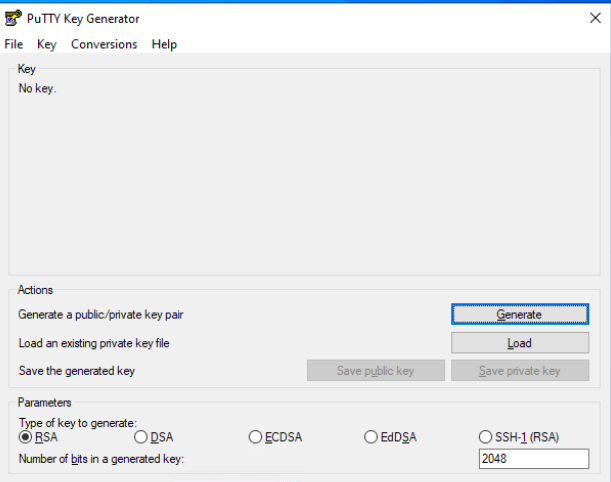
7) Once the key is generated, you should see something similar
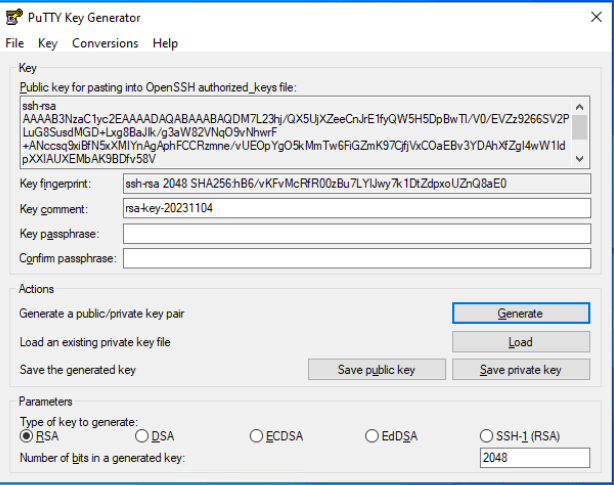
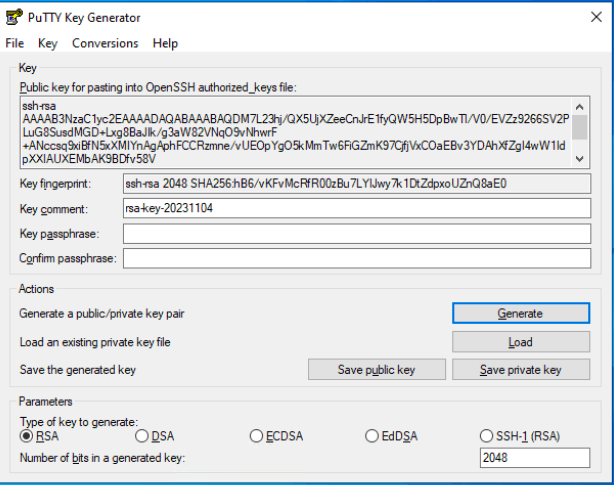
8) The “Key comment” box essentially will contain a value which will become the username when connecting to GCP. For our example, am setting this value to “test”. Select “Save private key” to save the generated key as a PuTTY private key. Select all the contents in the Key filed and copy it. Make sure you select everything in that box.
9) Switch back to the GCP console and paste this key value in the SSH Keys section. As you can see below the value “test” from the “Key comment” box in PuTTYgen has become the username
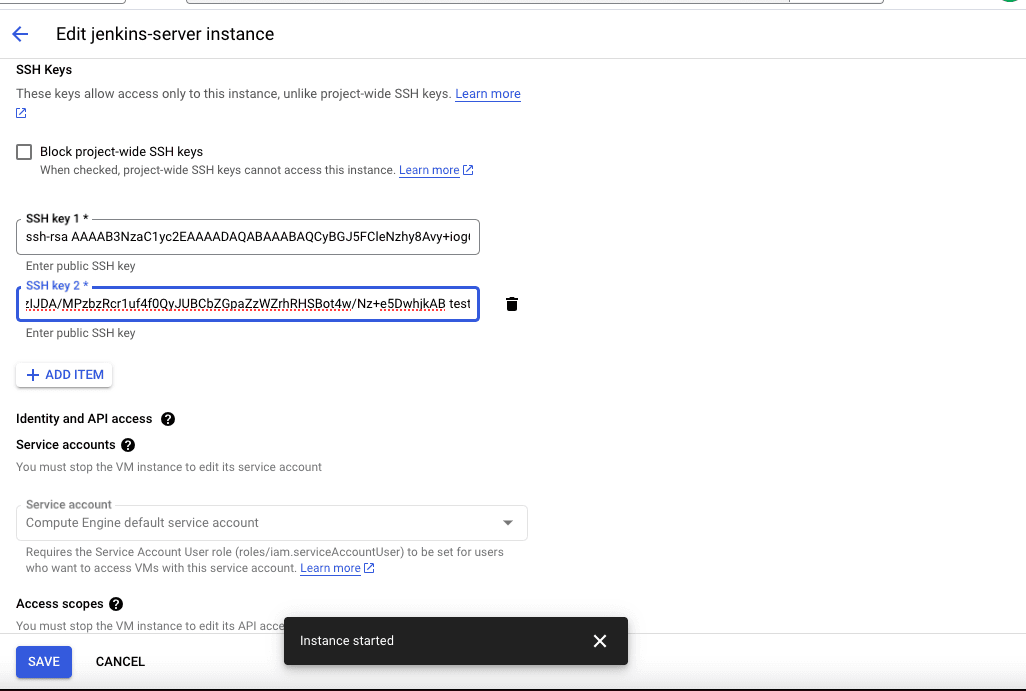
10) Click Save
11) Now let’s switch to PuTTY. From the left-hand menu select SSH >> Auth
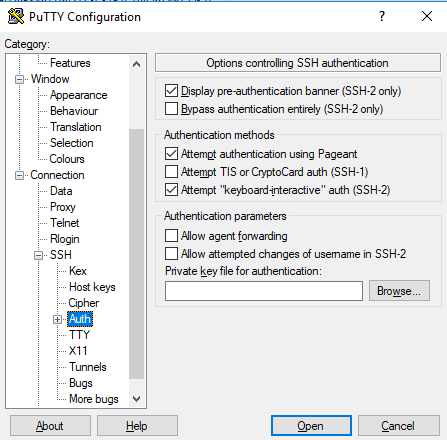
12) Browse and select the saved private key that we generated and saved using PuTTYgen. Then go to Sessions and paste the external IP of the the GCP VM in the Host Name field and hit enter
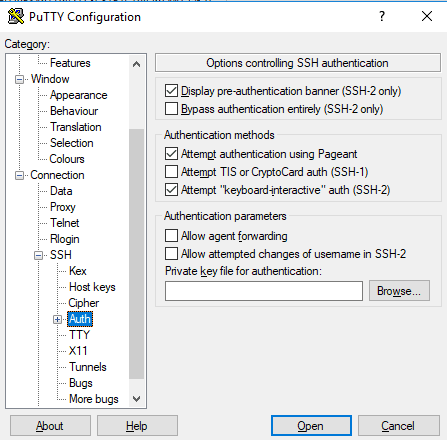
13) Click Open
14) You will get a message like this
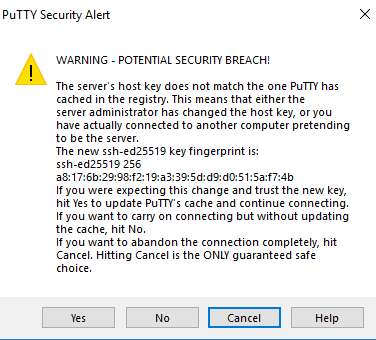
15) This is just PuTTY letting you know that the key is not in the registry. Ignore the message and click “Yes”
16) Create a Dockerfile for Creating Jenkins Server
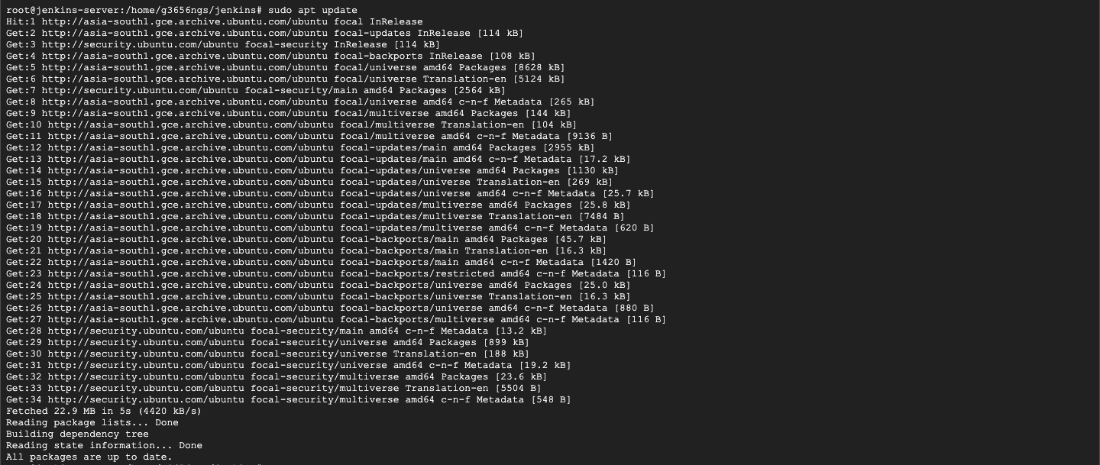
CMD: - sudo apt update
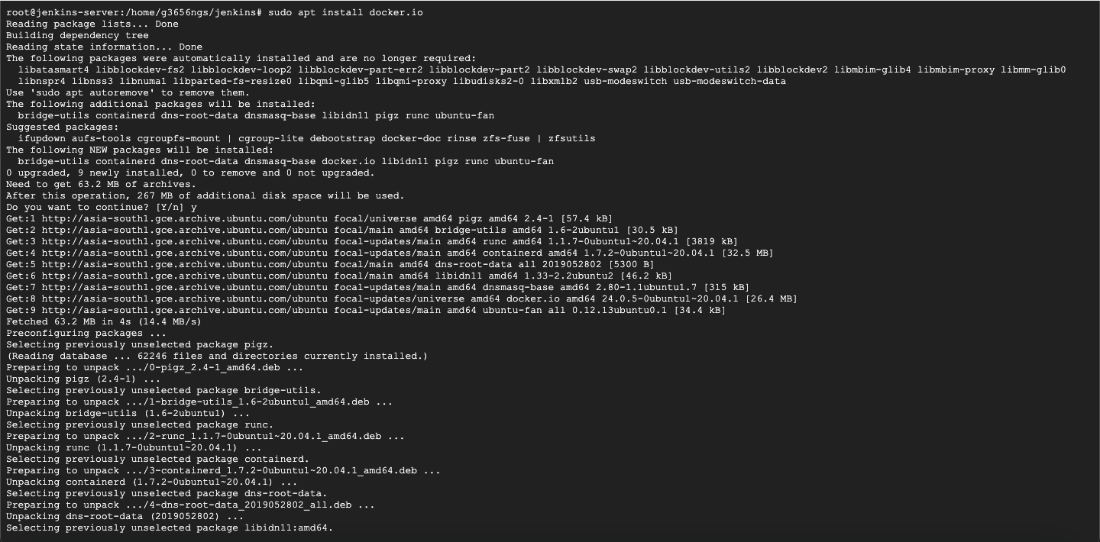
CMD: - sudo apt install docker.io -y
CMD: -
-> mkdir jenkins
-> cd jenkins
-> nano Dockerfile
FROM jenkins/jenkins:lts
USER root
RUN apt update
RUN apt install -y apt-transport-https ca-certificates
RUN curl gnupg2 software-properties-common
RUN curl -fsSL https://download.docker.com/linux/debian/gpg | apt-key add -
RUN apt-key fingerprint 0EBFCD88
RUN add-apt-repository "deb [arch=amd64] https://download.docker.com/linux/debian $(lsb_release -cs) stable"
RUN apt update && apt install -y docker-ce
RUN usermod -aG docker jenkins
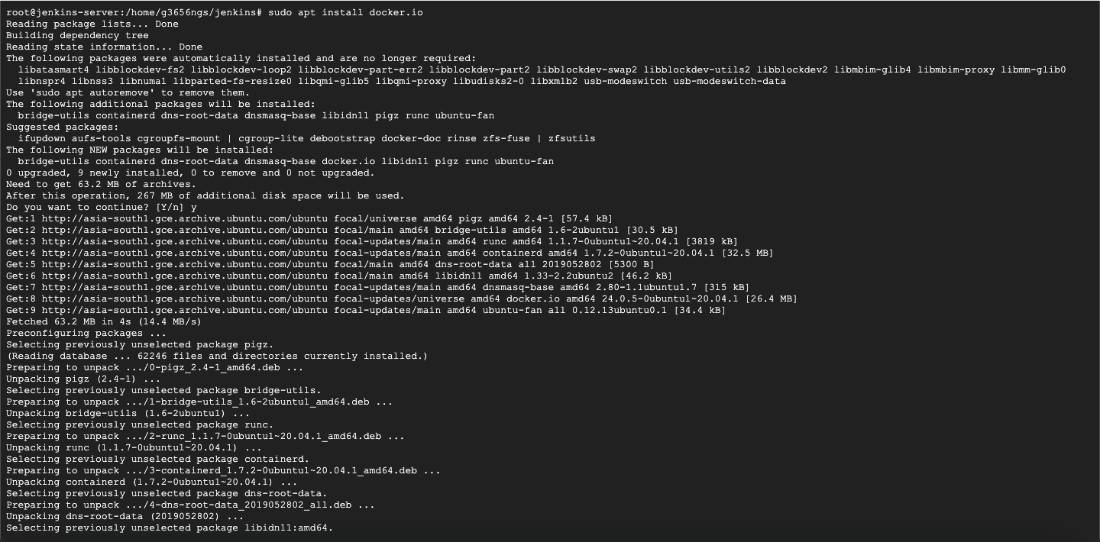
CMD:- docker build –t asia-south1-docker.pkg.dev/alert-snowfall-396211/jenkins/jenkins-server:v1 .
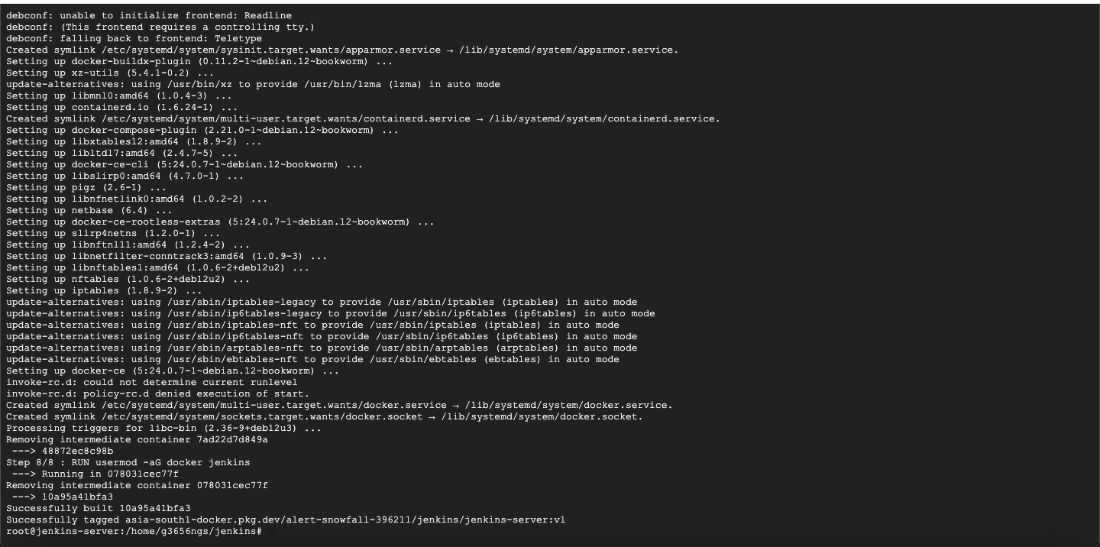
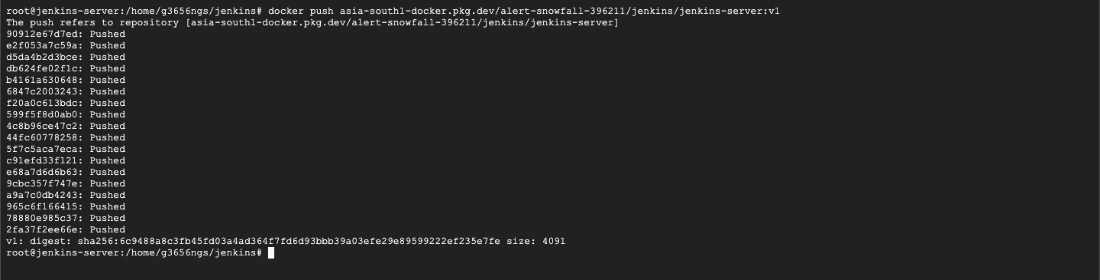
CMD: - docker push asia-south1-docker.pkg.dev/alert-snowfall-396211/jenkins/jenkins-server:v1
CMD: - docker run -it -u root -p 8080:8080 -v /var/run/docker.sock:/var/run/docker.sock -v $(which docker):/usr/bin/docker --name jenkins asia-south1-docker.pkg.dev/alert-snowfall-396211/jenkins/jenkins-server:v1

Take jenkins server vm ip and search in windows search
http://10.40.1.5:8080
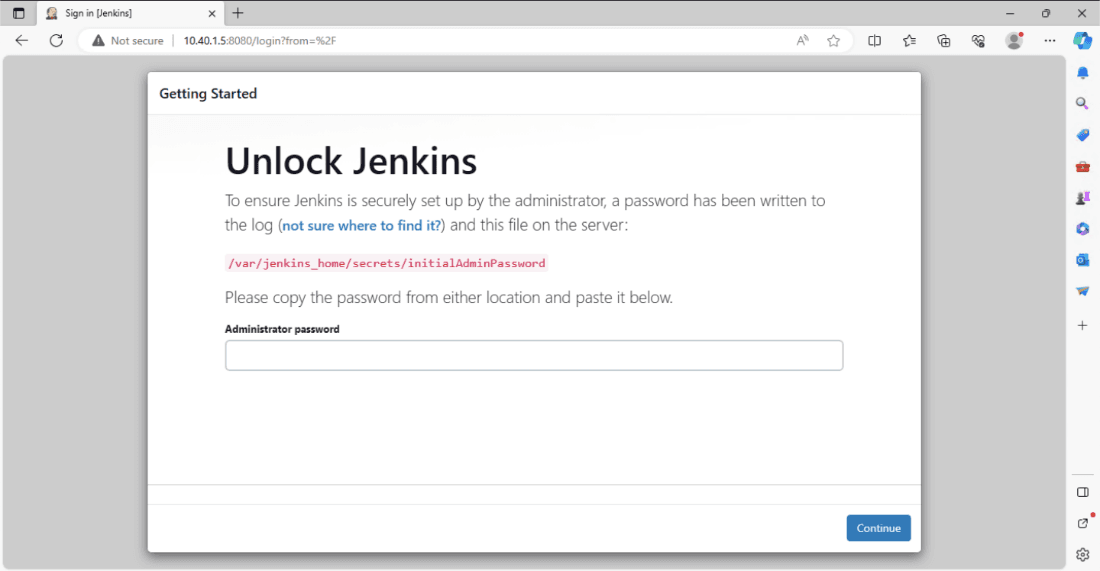
docker exec -it jenkins cat /var/jenkins_home/secrets/initialAdminPassword

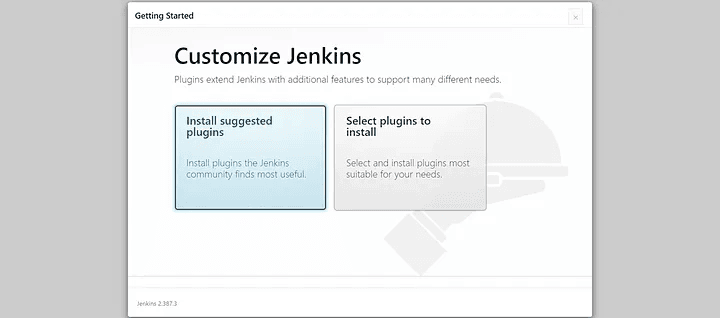
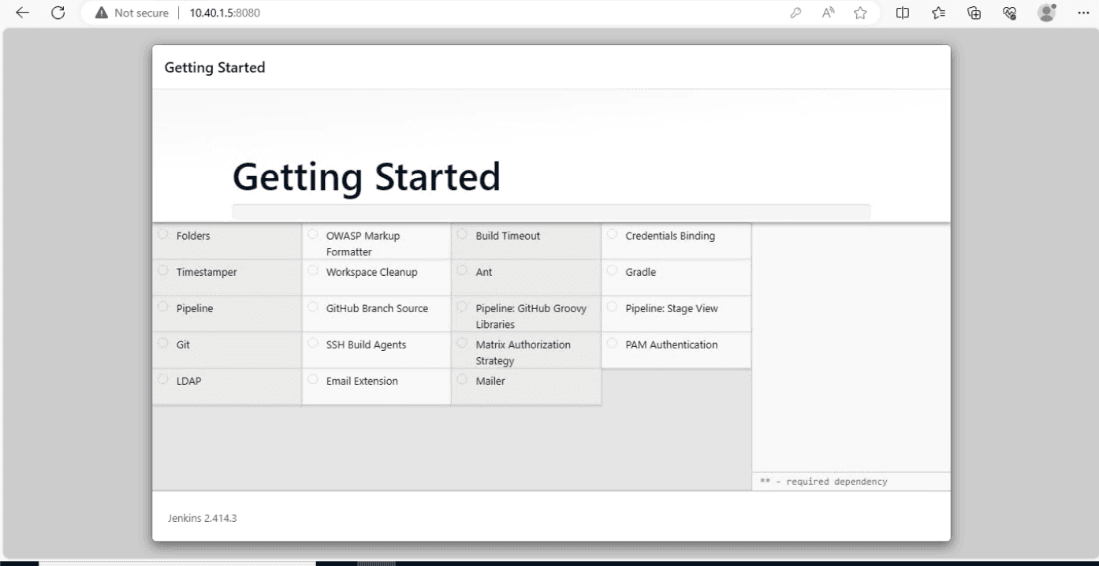
After completing the installation of the suggested plugin you need to set theFirst Admin User for Jenkins.
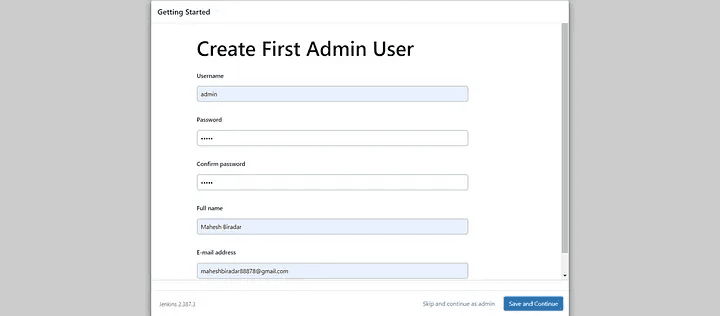
Click Save & Continue
Click Save & Finish
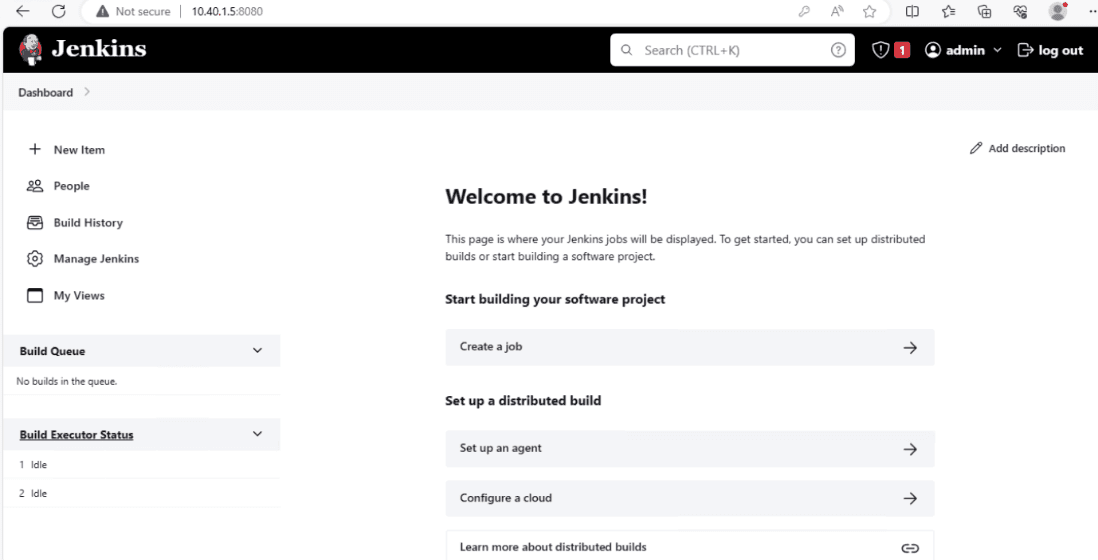
And now your Jenkins is ready for use.
Start using jenkins
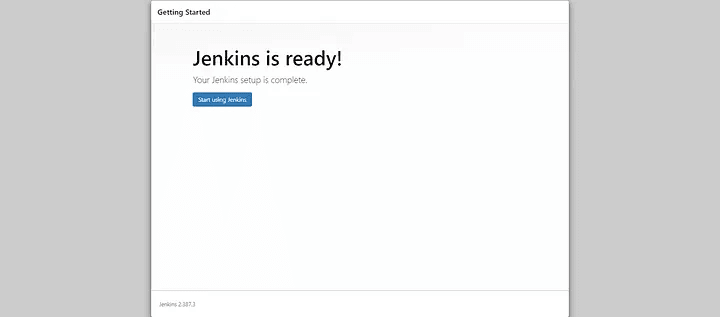
Click Start Jenkins
17) Setup SonarQube using Dockerfile
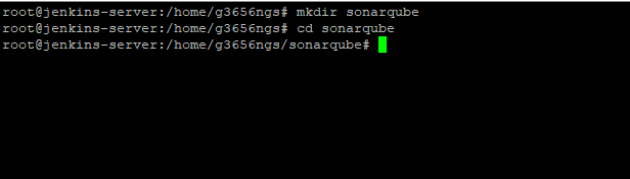
CMD:-
-> mkdir sonarqube
-> cd sonarqube
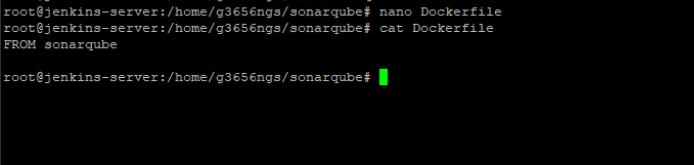
-> nano Dockerfile
FROM sonarqube
Using Docker build docker image
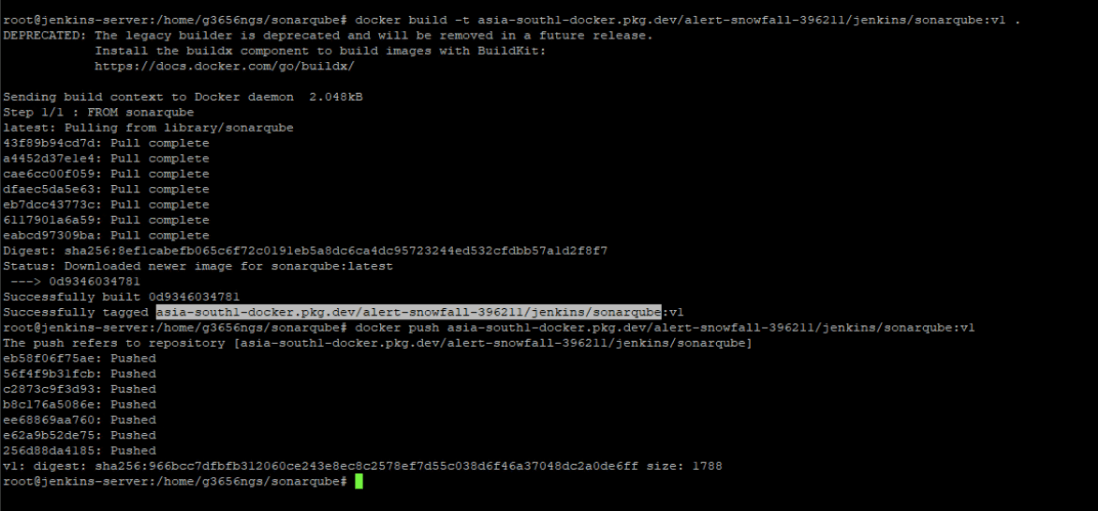
18) Using Docker build docker image
CMD: - docker build –t asia-south1-docker.pkg.dev/alert-snowfall-396211/jenkins/sonarqube:v1 .
docker push asia-south1-docker.pkg.dev/alert-snowfall-396211/jenkins/sonarqube:v1
19) Using docker run with that image
CMD:-
docker run –it –d –name sonarqube –p 9090:9000 –e SONAR_ES_BOOTSTRAP_CHECKS_DISABLE=true asia-south1-docker.pkg.dev/alert-snowfall-396211/jenkins/sonarqube:v1

20) Search URL: - http://10.40.1.5:9000
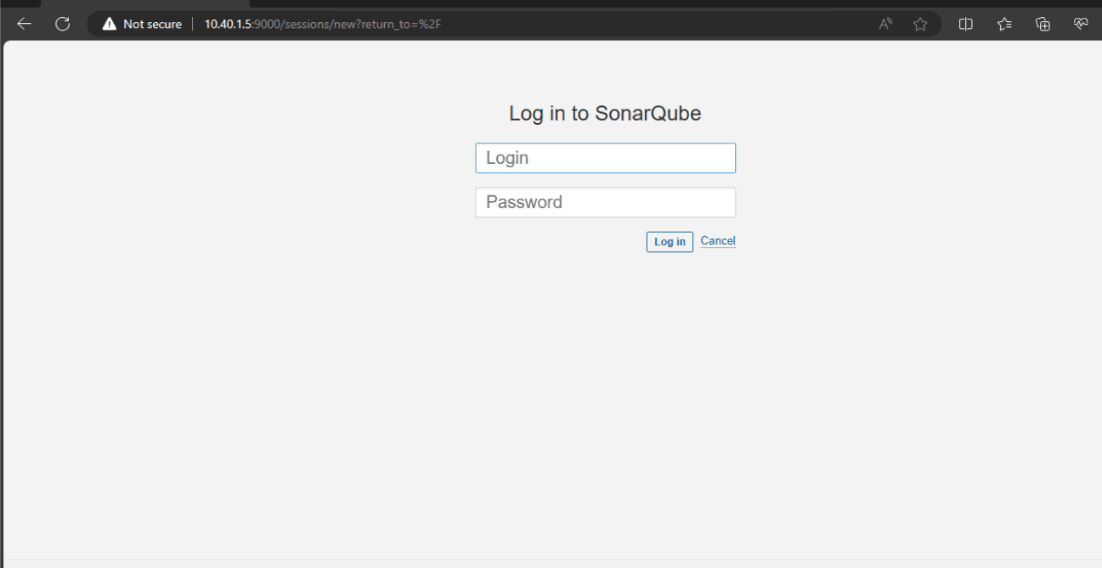
21) Login Using default cred username: - admin, password: - admin
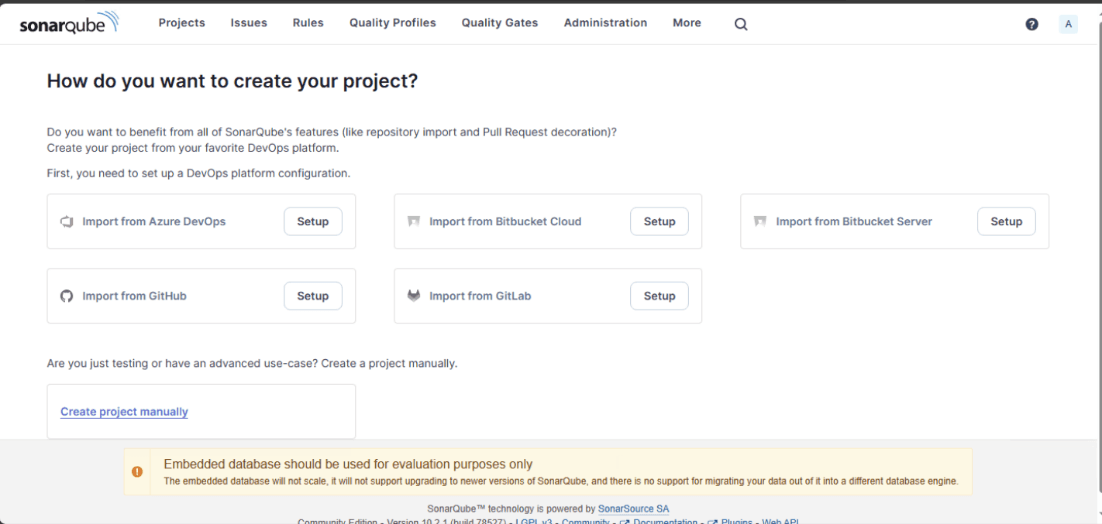
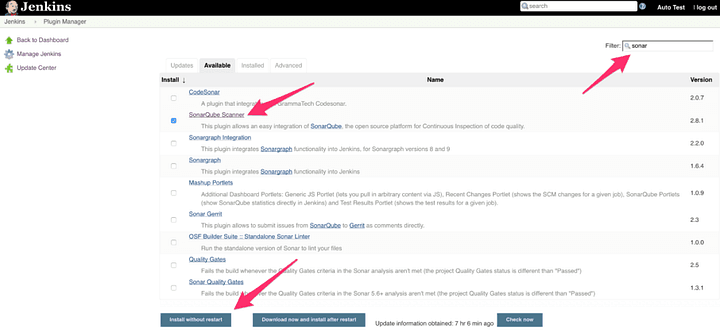
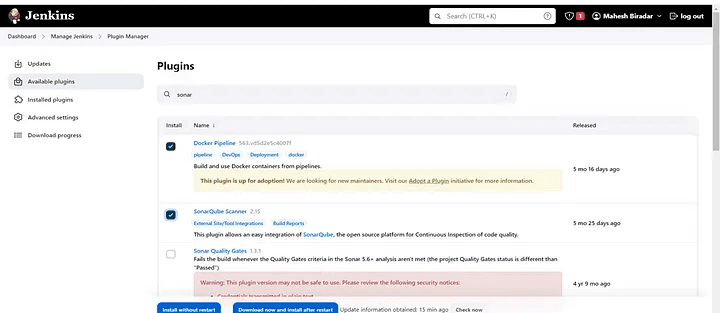
22) Now Install SonarQube Scanner Plugin in Jenkins (Manage Jenkins > Manage Plugins > Available > Search for SonarQube Scanner)
23) Now let’s switch to SonarQube setup
24) Now we will start the integration part
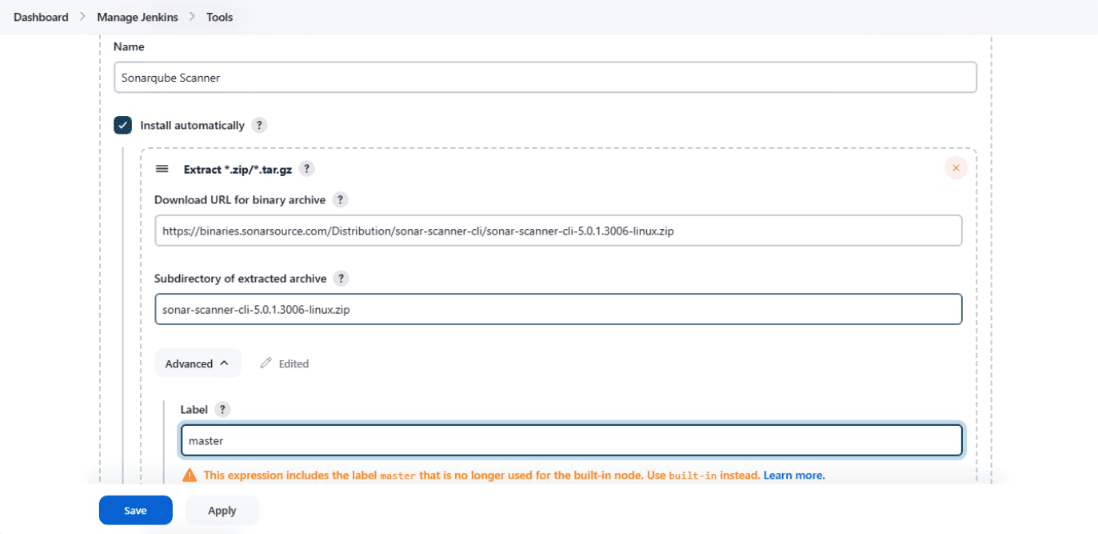
25) Open Jenkins and go to Manage Jenkins > Global Tool Configuration > SonarQube Scanner, Add Name “SonarQube Scanner”, Checked on Install Automatically, Click on “Add Installer”, Click on “Extract Zip/tar.gz”, now it will add three fields and add “master” in Label, “https://binaries.sonarsource.com/Distribution/sonar-scanner-cli/sonar-scanner-cli-5.0.1.3006-linux.zip” in “Download URL for binary archive”, “sonar-scanner-cli-5.0.1.3006-linux.zip” in “Subdirectory of extracted archive” as shown in image
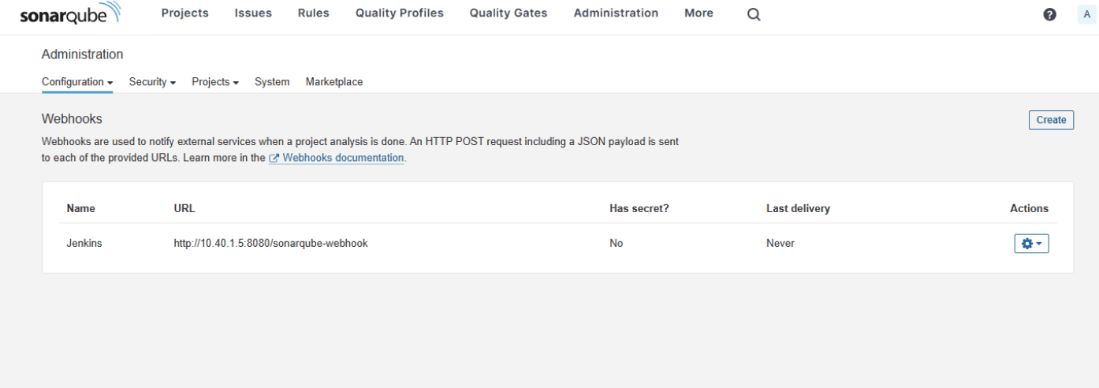
26) Get the IP of your host machine and add webhook in SonarQube to point to Jenkins (Administration > Configuration > Webhooks); URL will be in the format http://:8080/sonarqube-webhook
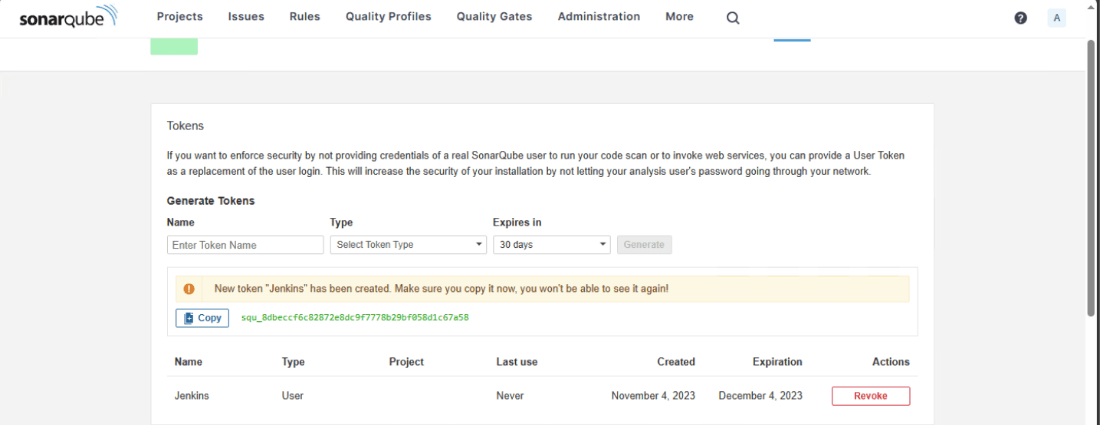
27) In SonarQube, generate an access token that will be used by Jenkins (My Account > Security > Tokens)
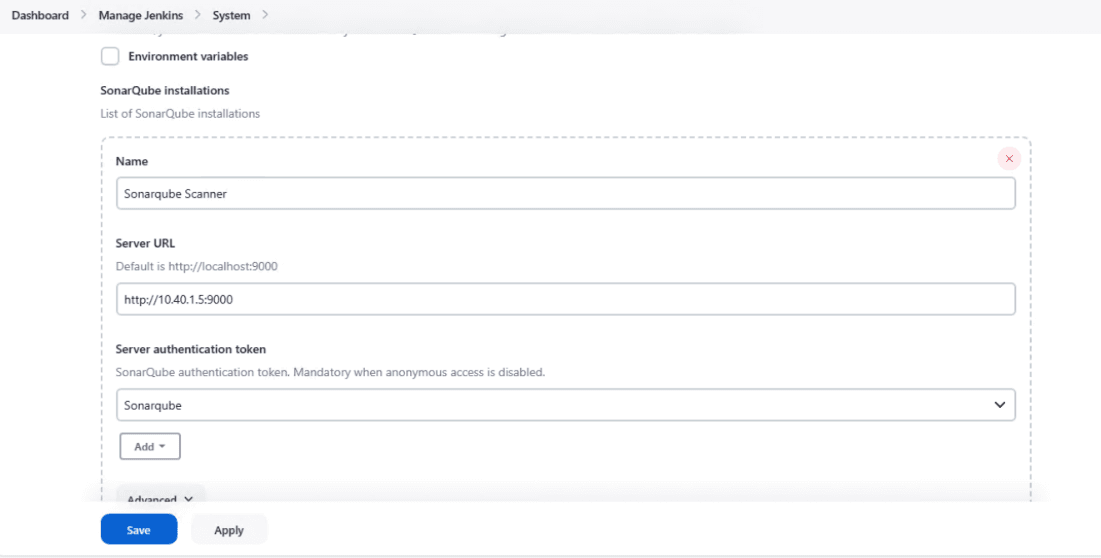
28) in Jenkins, add the SonarQube Server IP address and the access token (Manage Jenkins > Configure System > SonarQube Servers); URL will be in the format http://10.40.1.5:9000
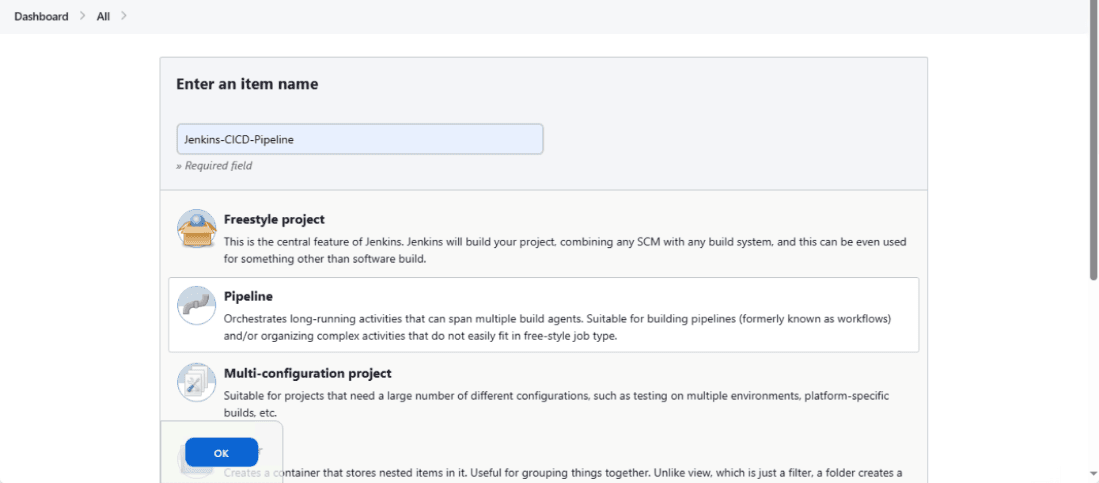
29) Create a Jenkins Pipeline (Click Item > Give name > Pipeline)
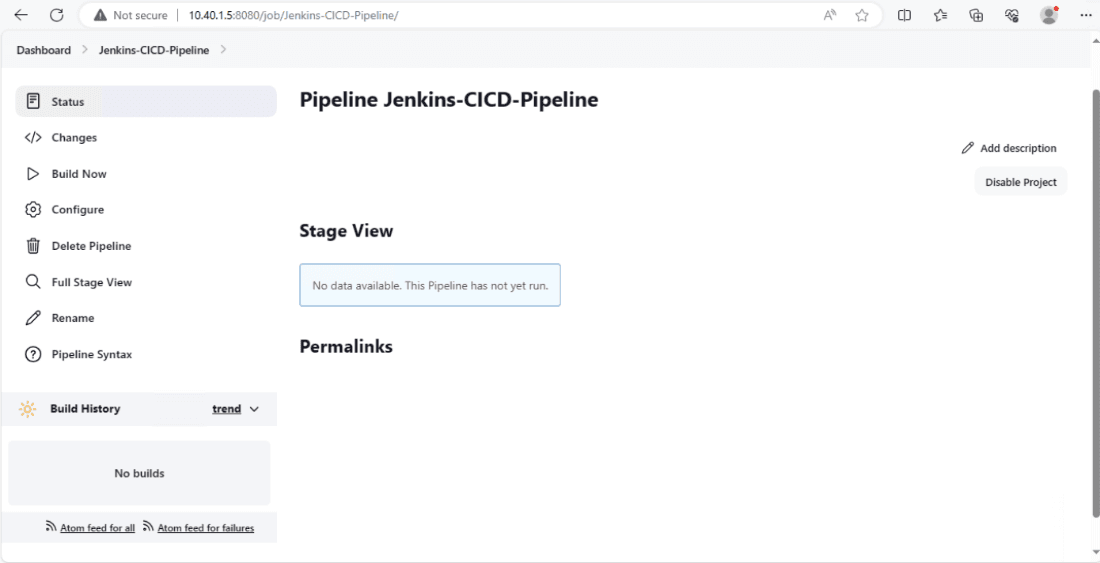
30) Jenkins Pipeline
pipeline { agent any environment { NAME="test" VERSION="${env.BUILD_ID}" IMAGE_REPO="shashank3656" GIT_USER_NAME="shashank3656" GIT_REPO_NAME="reactjs" }
stages { stage('Checkout') { steps { sh 'rm -rf reactjs' sh 'git clone https://github.com/shashank3656/reactjs.git' sh 'git checkout master' } }
stage('SonarQube analysis'){ steps{ sh '/var/jenkins_home/tools/hudson.plugins.sonar. SonarRunnerInstallation/SonarQube/bin/ sonar-scanner -Dsonar.properties=sonar.properties' } }
stage ('Docker_Build') { steps { sh 'docker login --username shashank3656 --password gowthamn1' sh 'docker build -t shashank3656/build:$BUILD_ID .' } }
stage ('Push') { steps { sh 'docker login --username shashank3656 --password gowthamn1' sh 'docker push shashank3656/build:$BUILD_ID' } }
stage('Checkout K8S manifest SCM') { steps { git credentialsId: 'Github', url: 'https://github.com/shashank3656/reactjs.git', branch: 'master' } }
stage('Update K8S manifest & push to Repo') { steps { dir("reactjs/k8s") { withCredentials([gitUsernamePassword(credentialsId: 'Github', gitToolName: 'Default')]) { sh ''' cat deployment.yaml sed -i "s#shashank3656.*#${IMAGE_REPO}/build:${VERSION}#g" deployment.yaml cat deployment.yaml git config --global user.email "shashankgowtham12@gmail.com" git config --global user.name "shashank3656" git add deployment.yaml git commit -m 'Updated the deploy yaml | Jenkins Pipeline' git remote -v git push https://github.com/shashank3656/reactjs.git HEAD:master ''' }
}
}
}
}
}
31) Goto Jenkins Dashboard ==>Manage Jenkins ==>Plugins ==>Available plugins
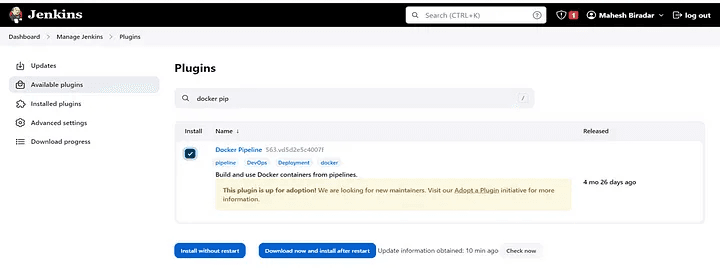
32) SonarQube Scanner
33) RUN the pipeline
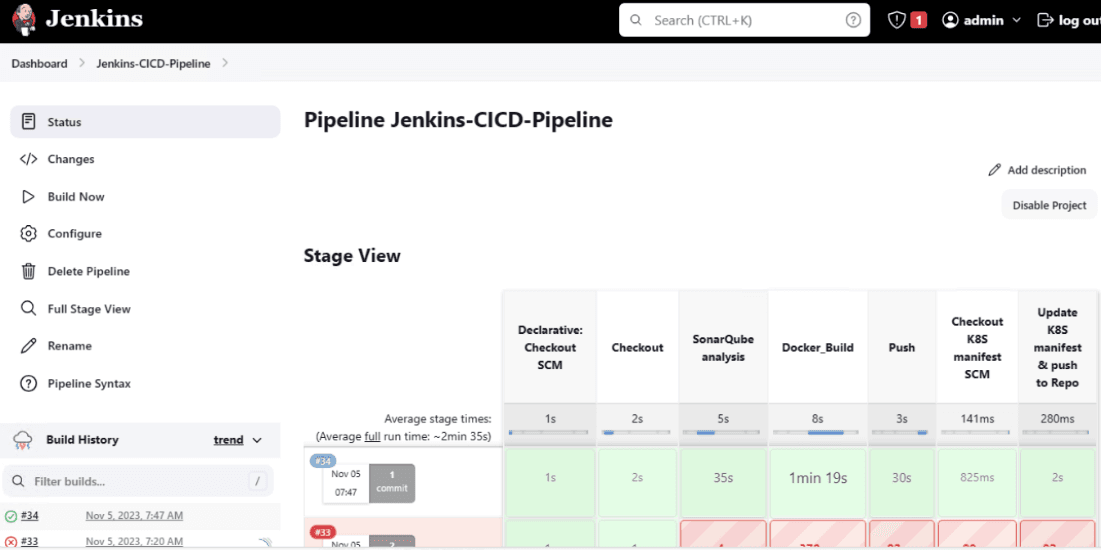
34) SonarQube Output
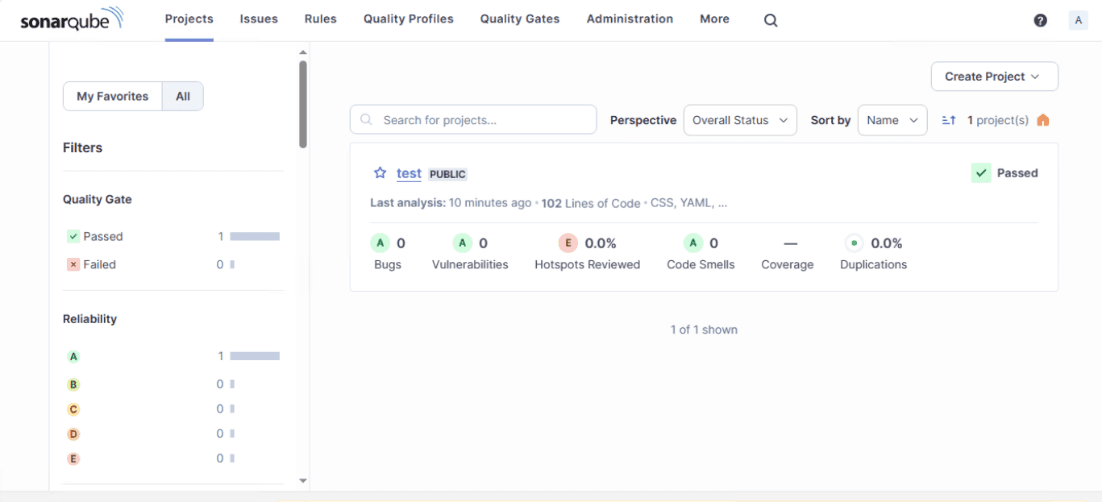
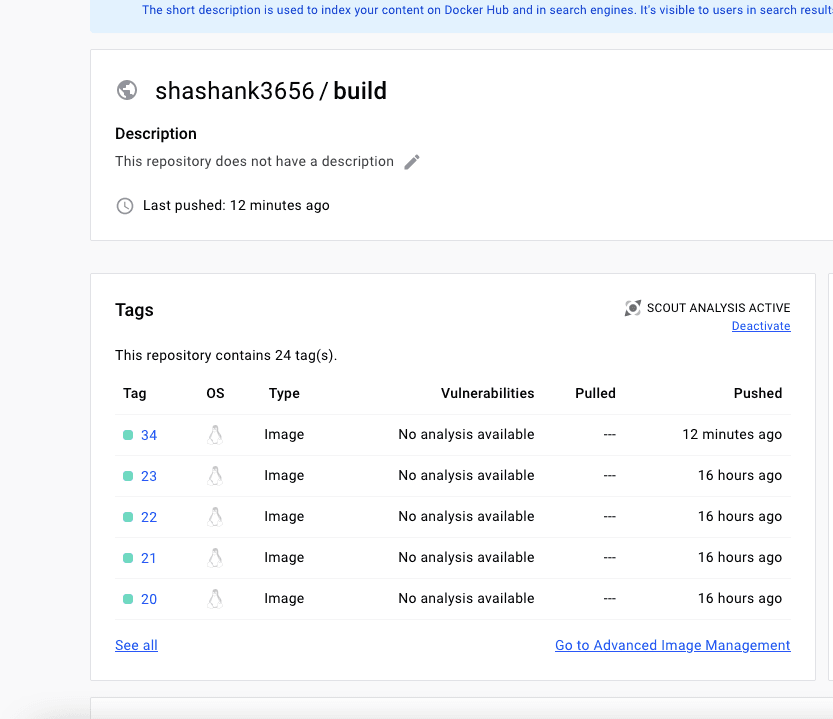
35) Check DockerHub, that a new image is created for your Nodejs Application
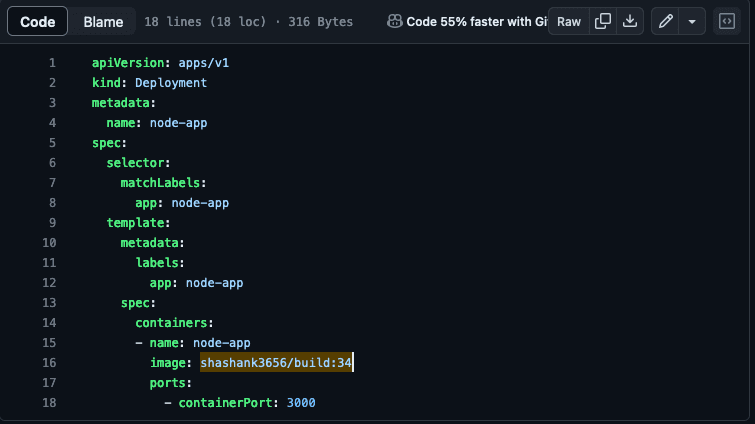
36) In Repo deployement.yml file gets updated with the latest image.
37) This way, we completed CI (Continuous Integration) Part. Nodejs application is built, SonarQube completed static code analysis and the latest image is created, push to DockerHub and updated Manifest repository with the latest image.
Continuous Delivery Part
Setup GKE Cluster in GCP
GCP Kubernetes engine (GKE)
AIM
- Create a Kubernetes Cluster
- Create all Kubernetes NodePools in Private subnet
- Create a Private Compute Engine with Kubernetes-Admin Access to the cluster
References
https://cloud.google.com/kubernetes-engine/docs/how-to
https://www.youtube.com/watch?v=hxpGC19PzwI
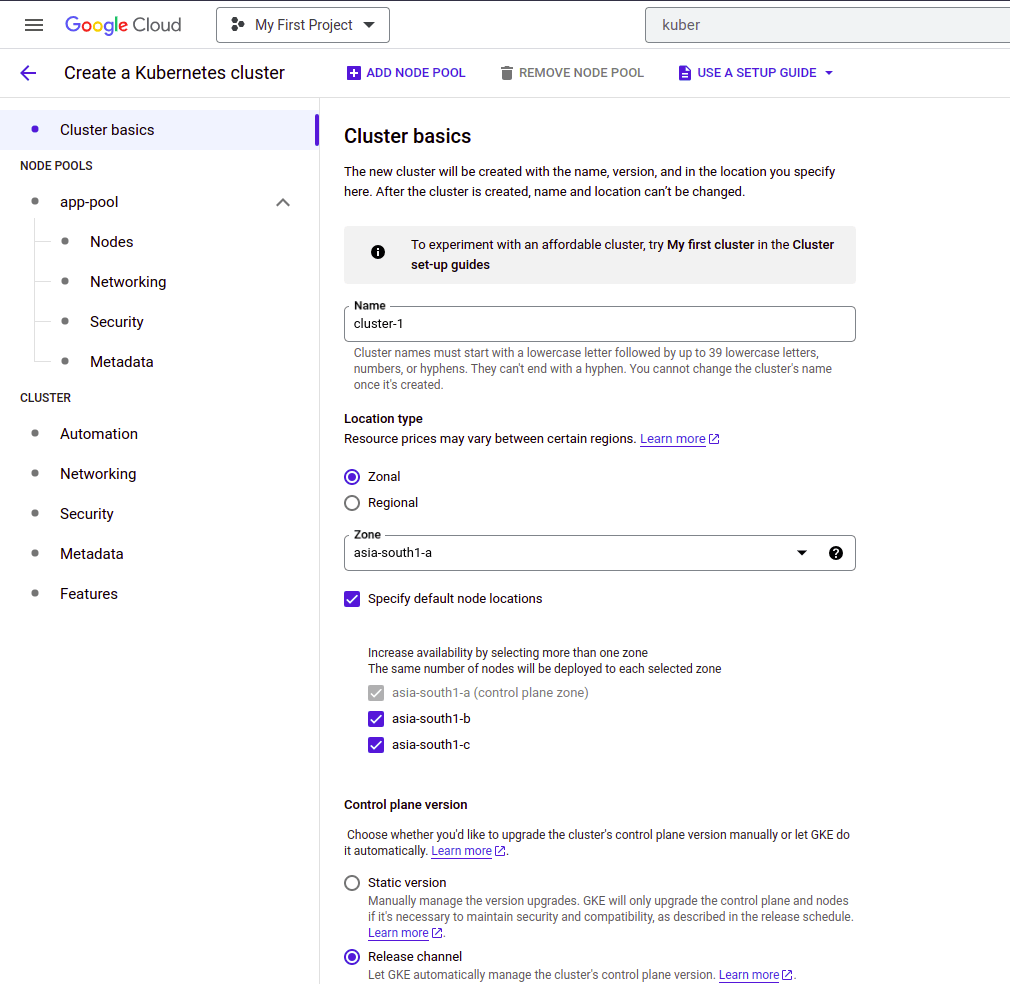
Creating GKE
- Navigate to Kubernetes engine.
- Click Create. Select GKE standard.
- Name your cluster as “cluster-demo”
- Choose location type as zonal. Set zone “asia-south1-a".
- Set Release channel as default.(WHY and why not choose static version)
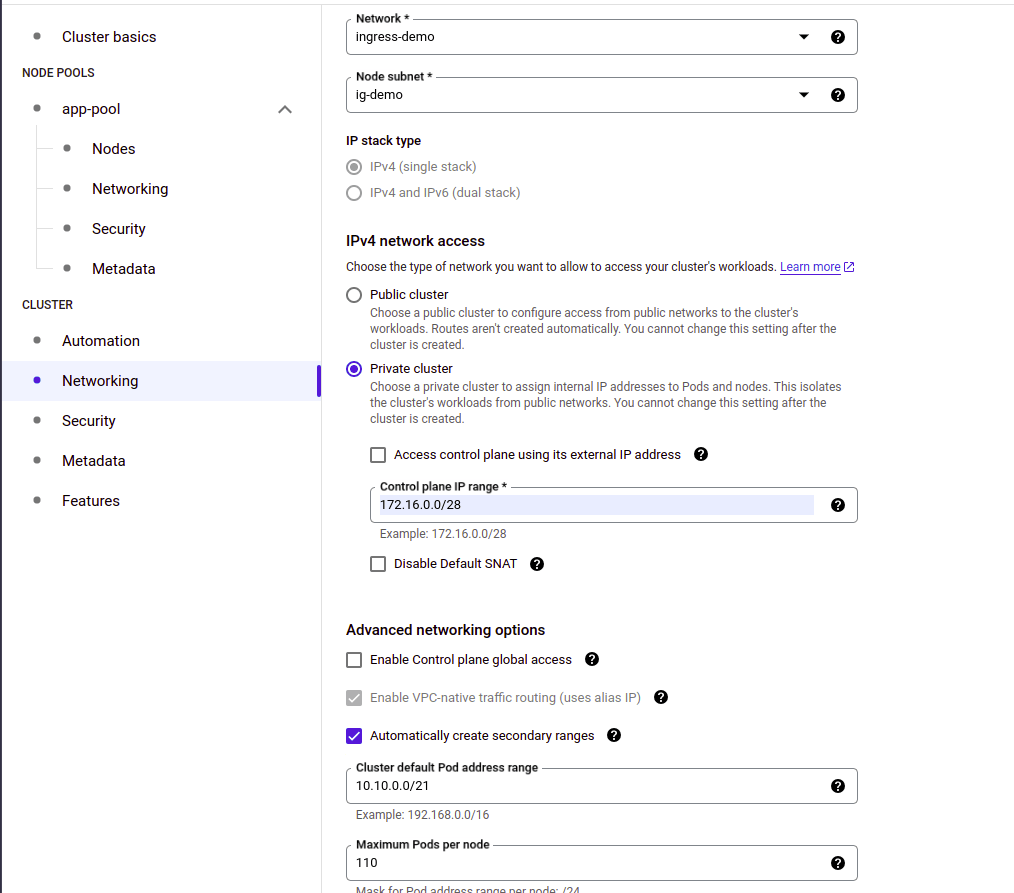
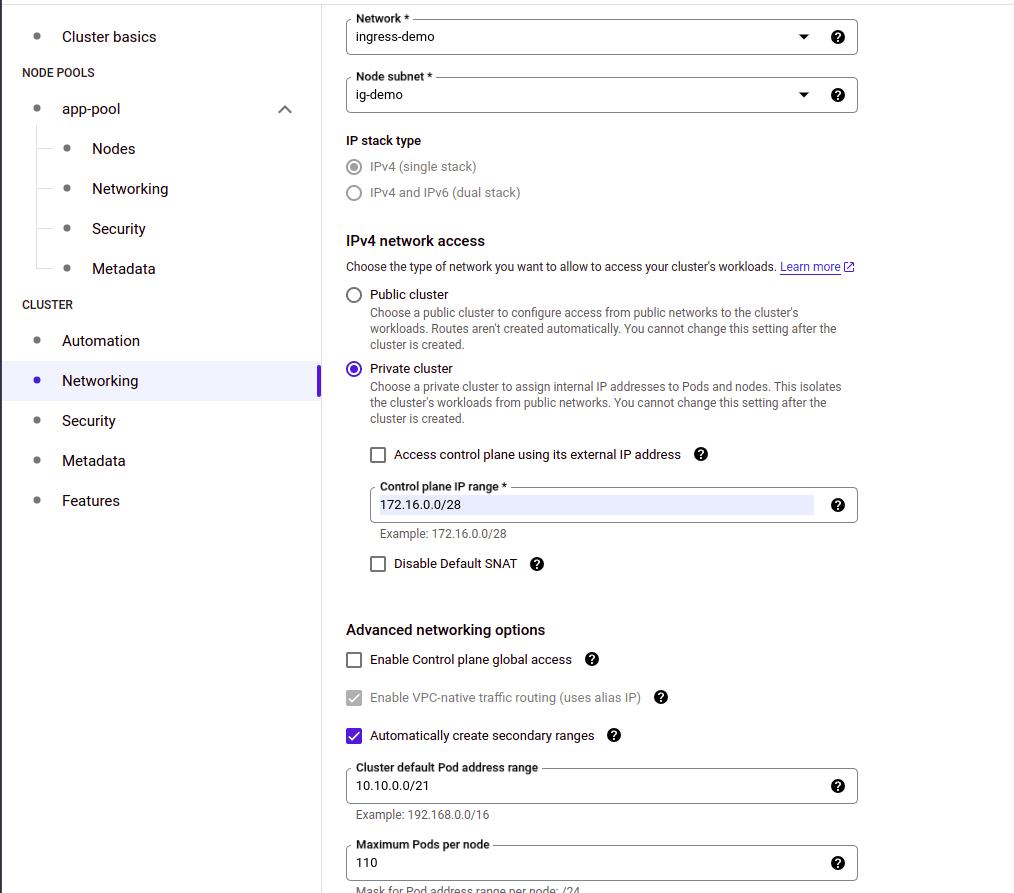
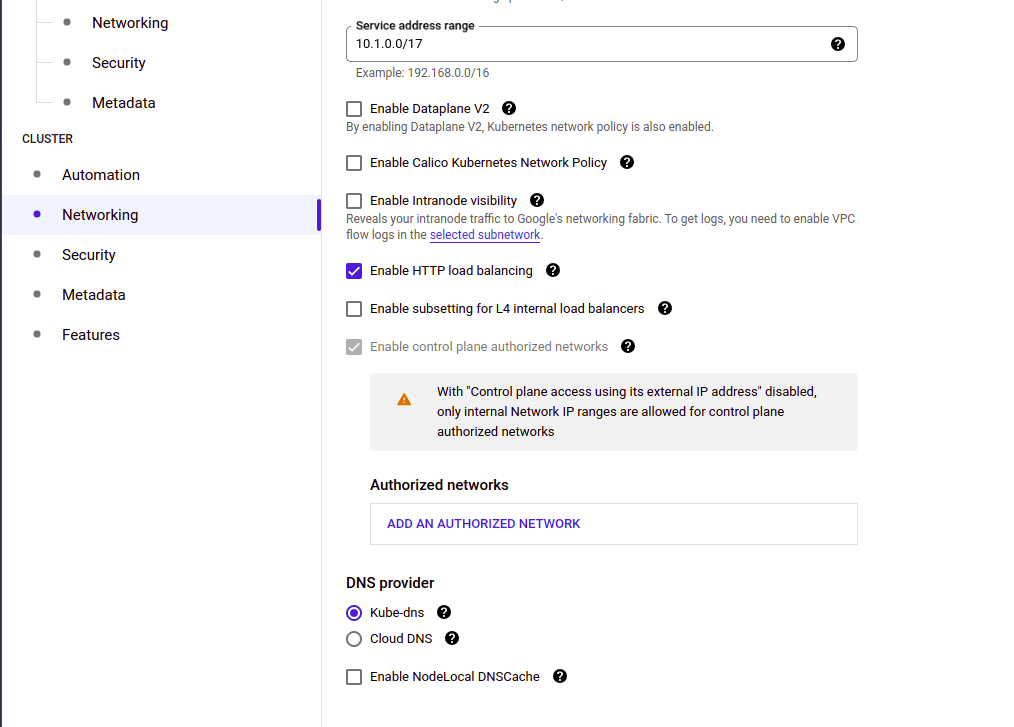
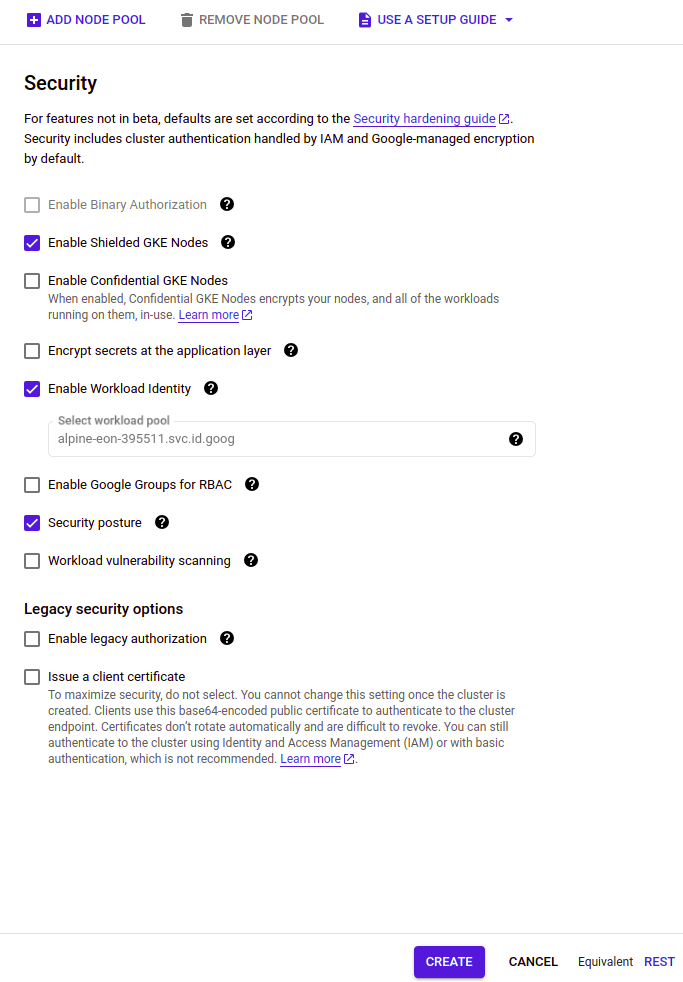
Follow the screenshot to create the cluster to use Anthos Service Mesh
6) Create Cluster
7)
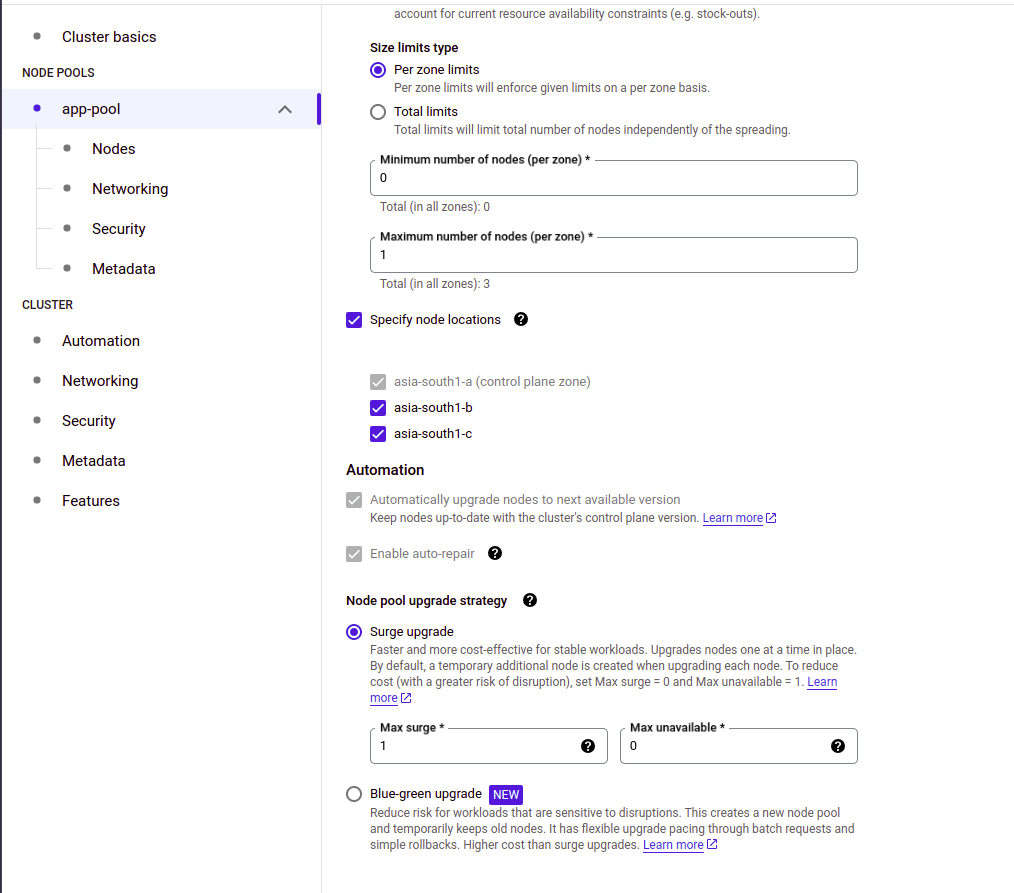
8)
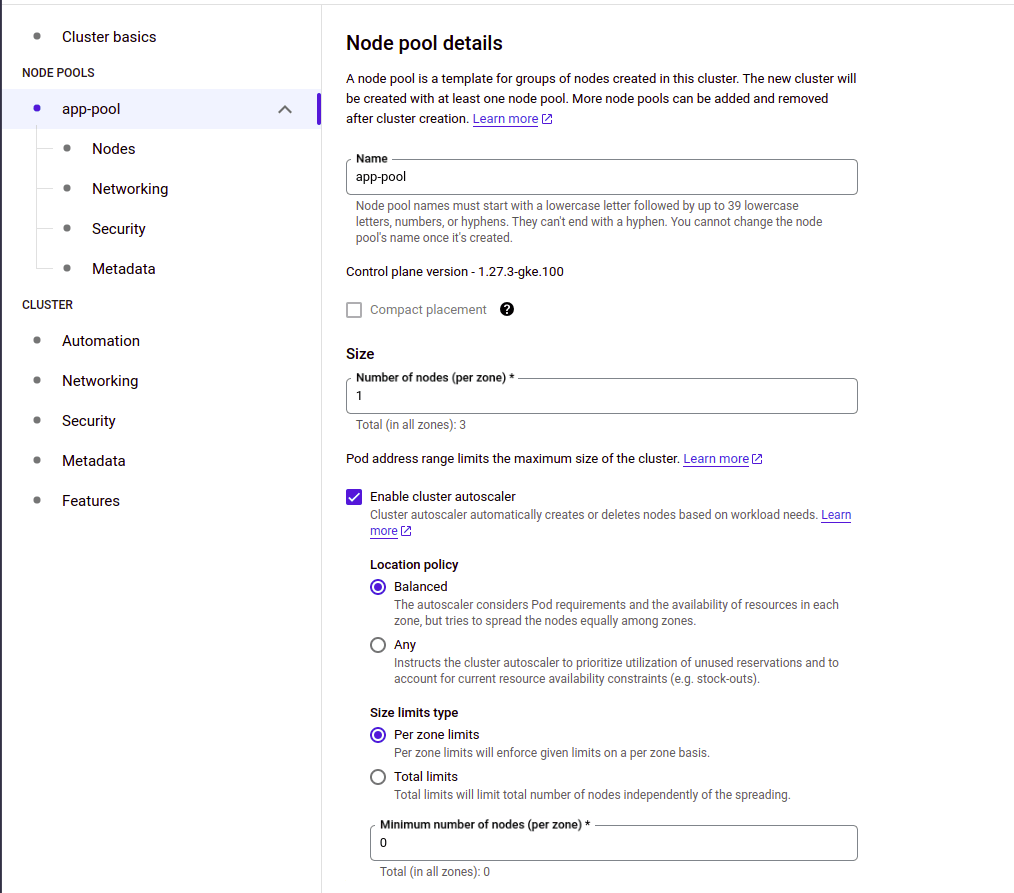
9) <br /
10)
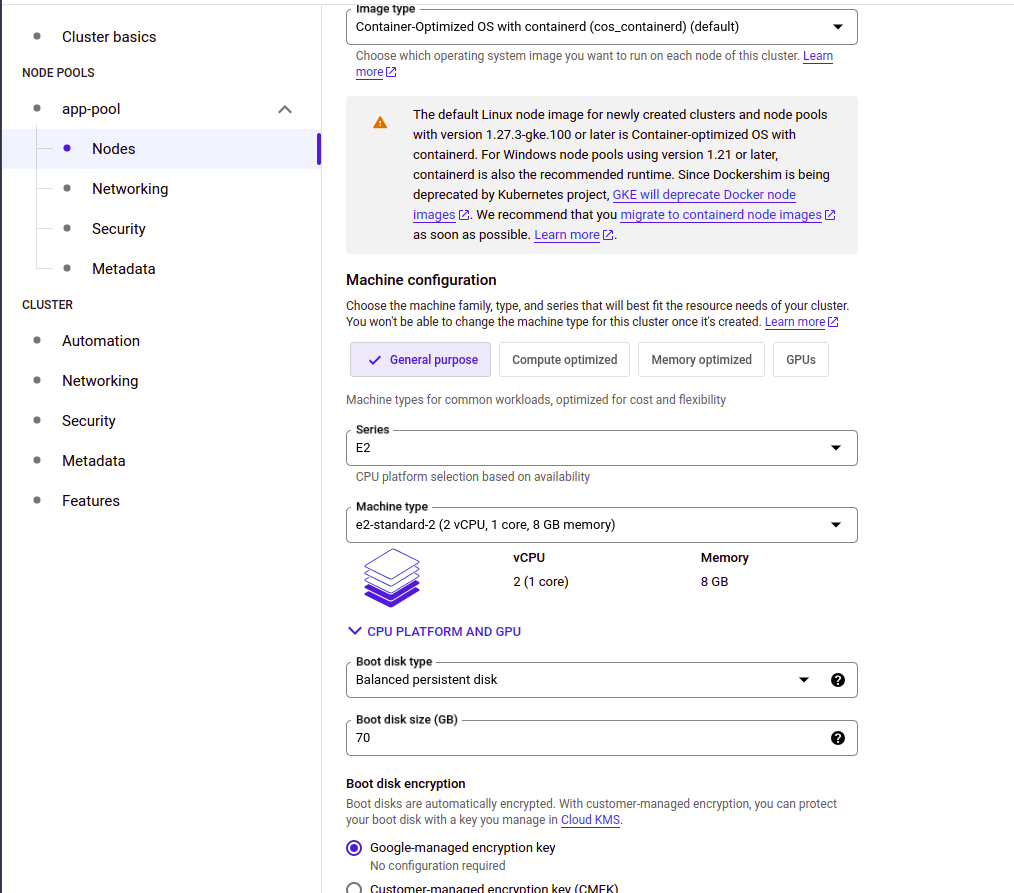
11)
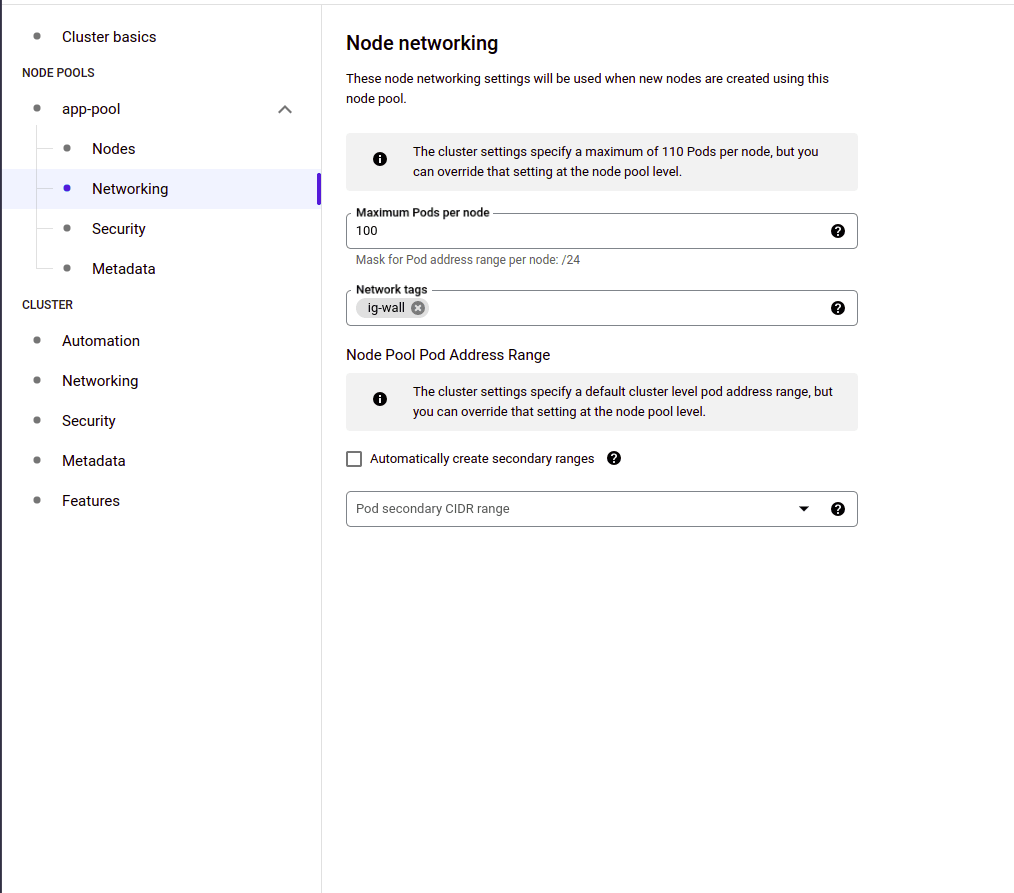
12)
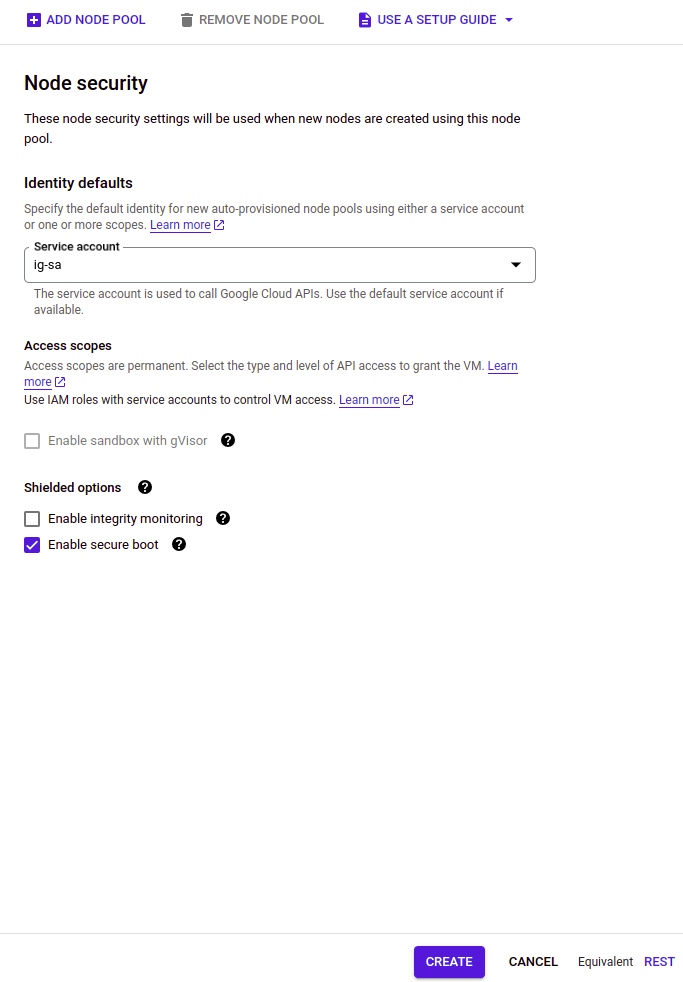
13)
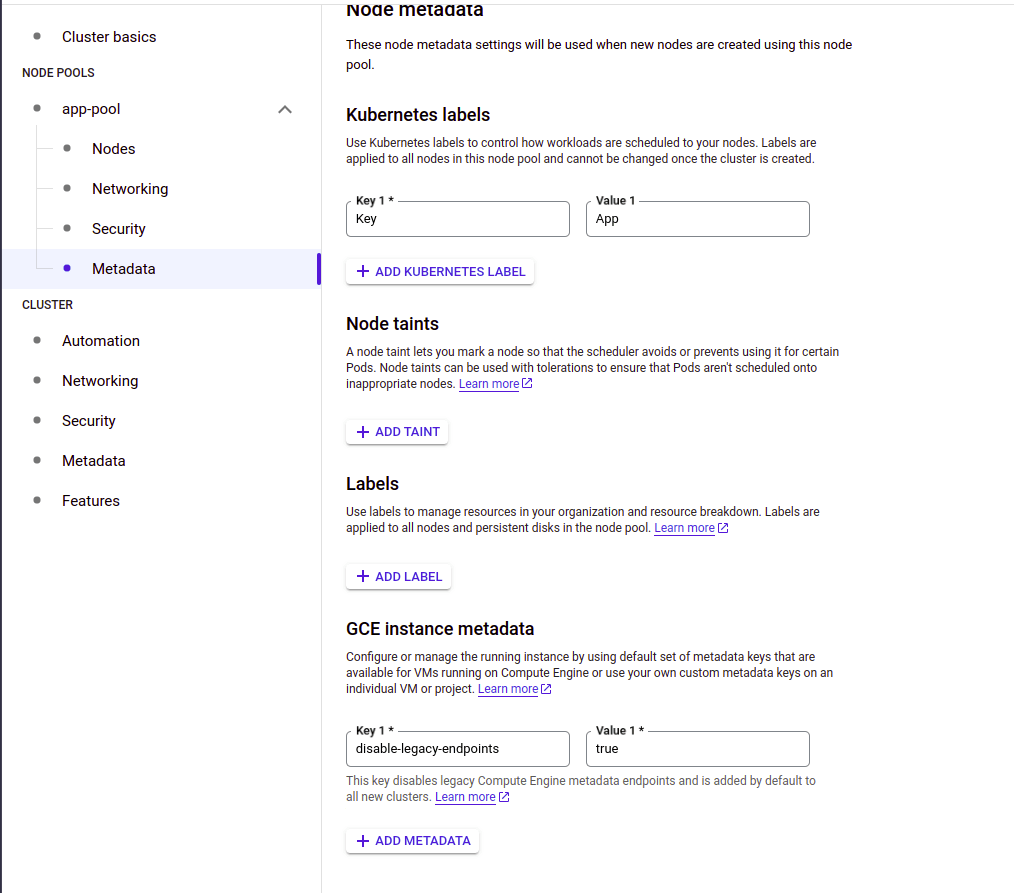
14)
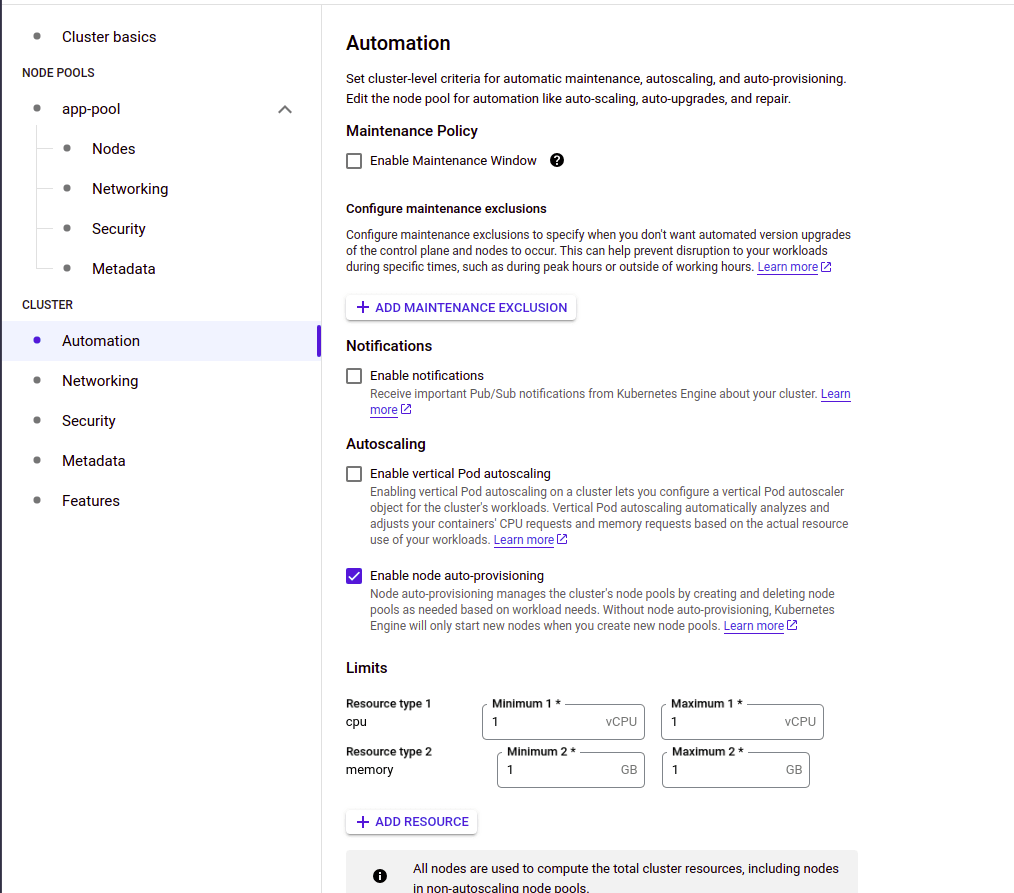
15)
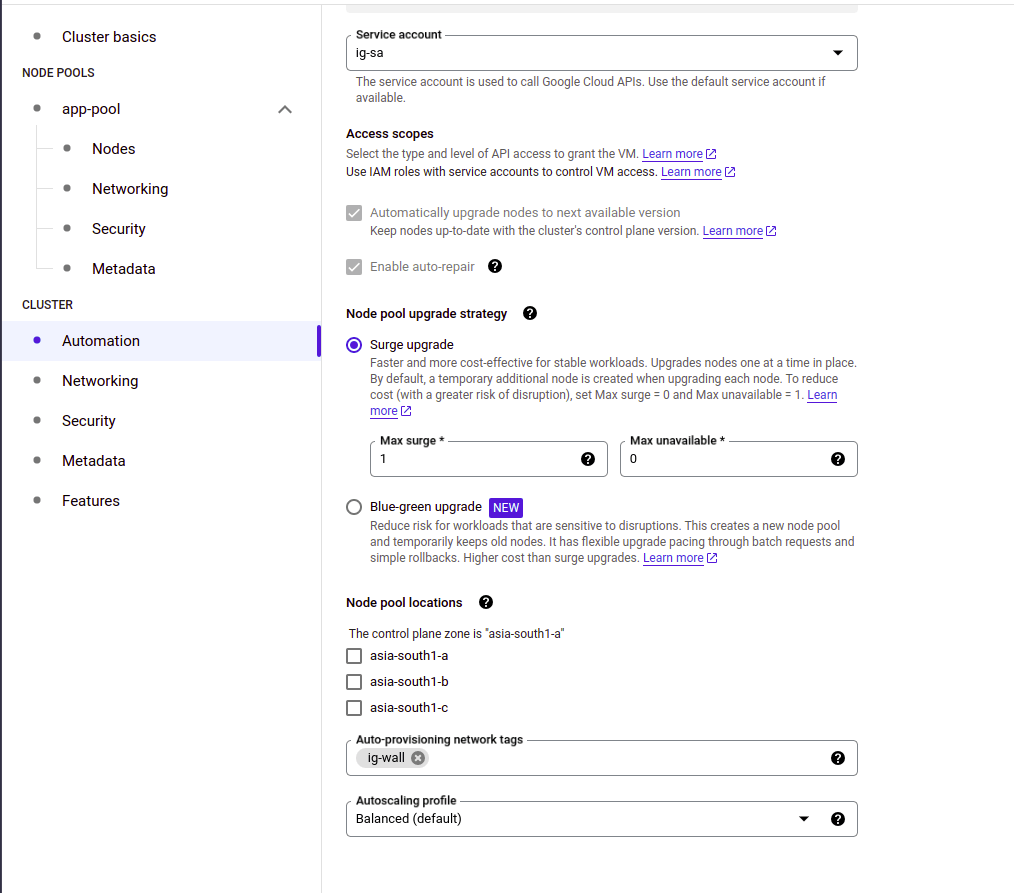
16)
17)
18)
19)
20)
21)
22)
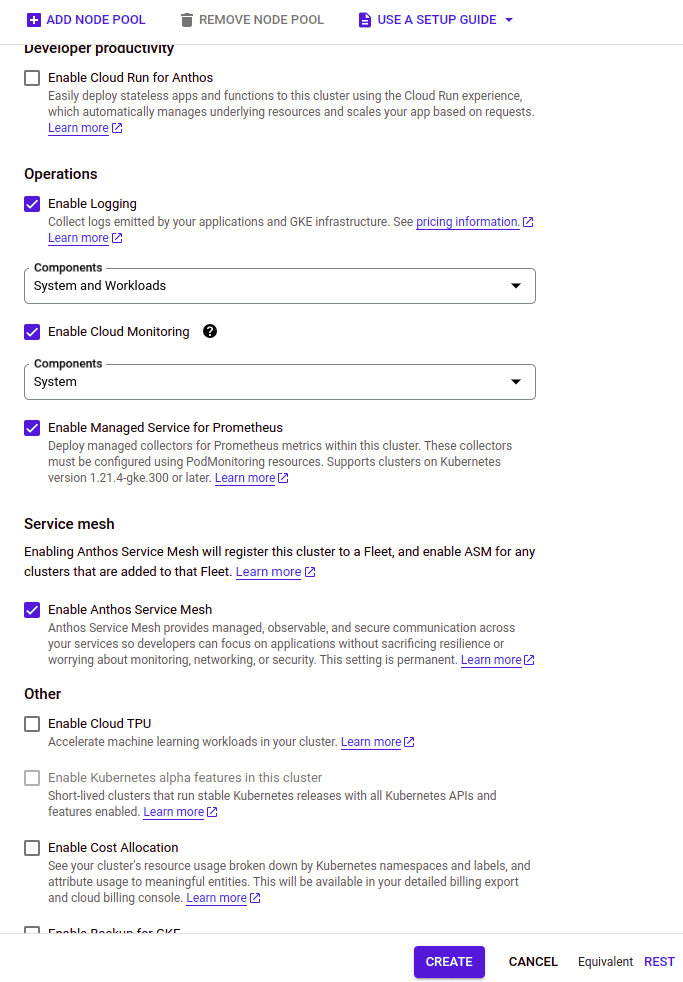
23)
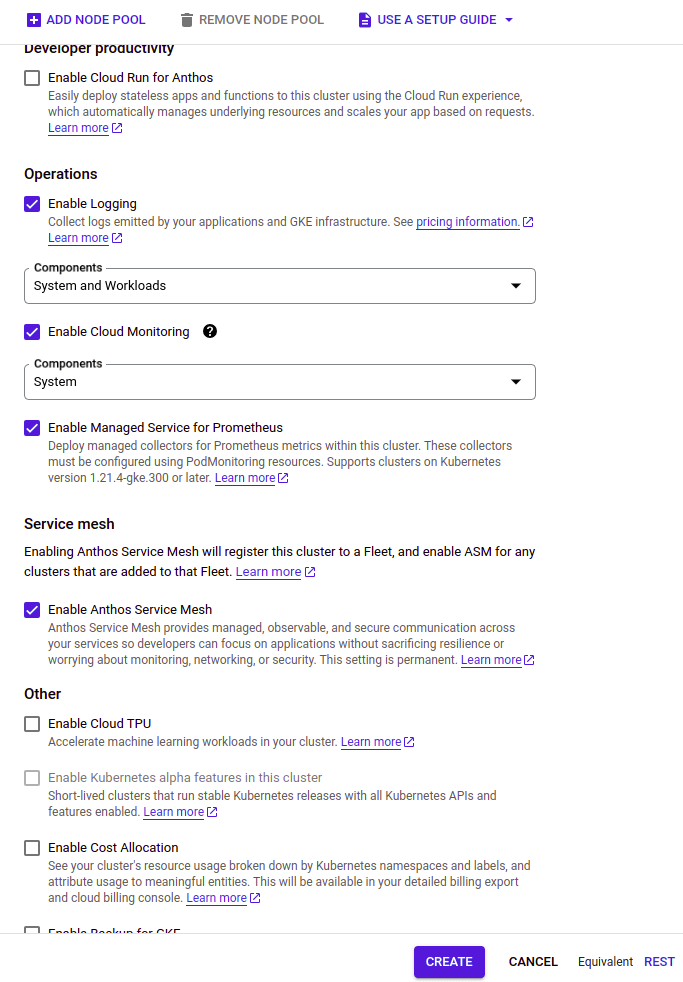
24)
25)
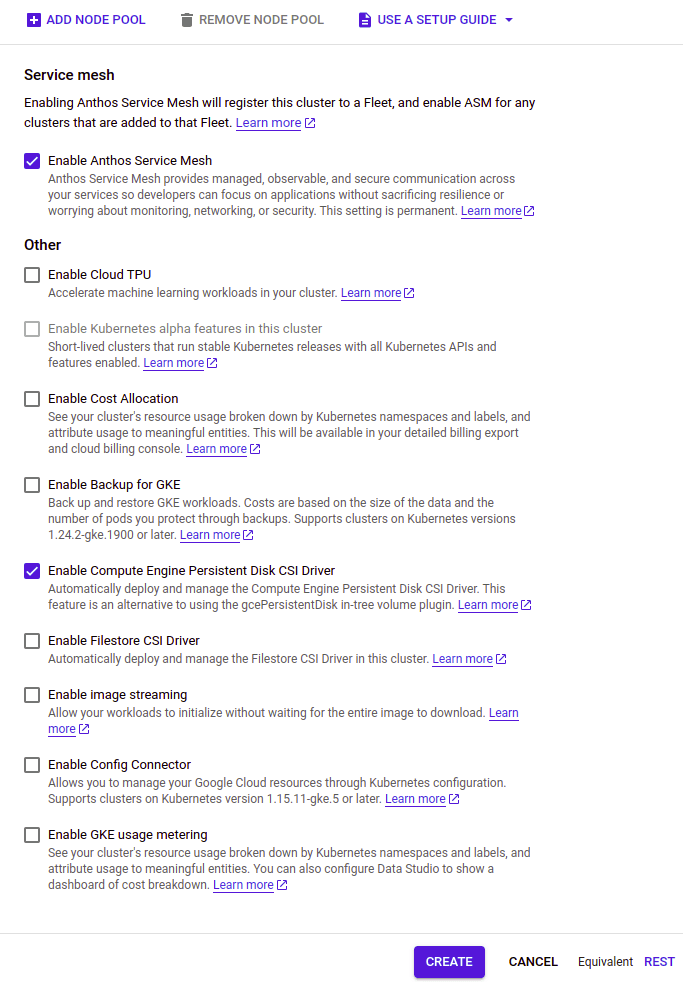
VM-instance(private)
26) Create a new instance and name it “private-instance”. Set region as “asia-south1” and zone as “asia-south1-a".
27) Configure machine type as “e2-micro”
28)
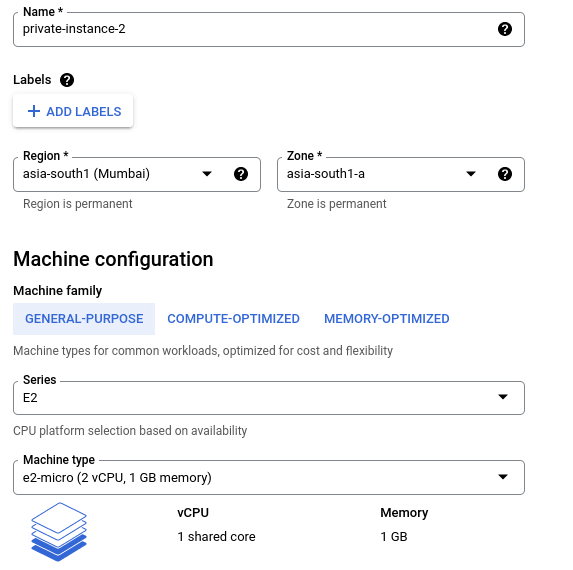
29)Under identity and API access, select service-account as “gke-access-service".
30) Specify Network tags as “private”.(The target network tag value of the desired firewall rules)
31)
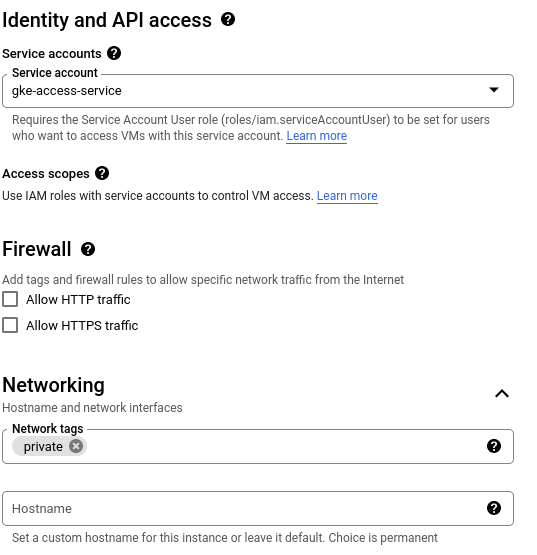
32) Add “vpc-private” as network interface. Select subnet as “subnet-private”.
<br /. 33) Set primary internal ip as “ephemeral”(Why) and external ip as none.
34) Create.
SSH into instance
35) Run the command “gcloud container clusters get-credentials cluster-1 --zone asia-south1-a --project watchful-hall-342709" to connect to the cluster. (To update the kubeconfig)
36) .Install kubectl.
37) Run kubectl commands.

Autoscaling
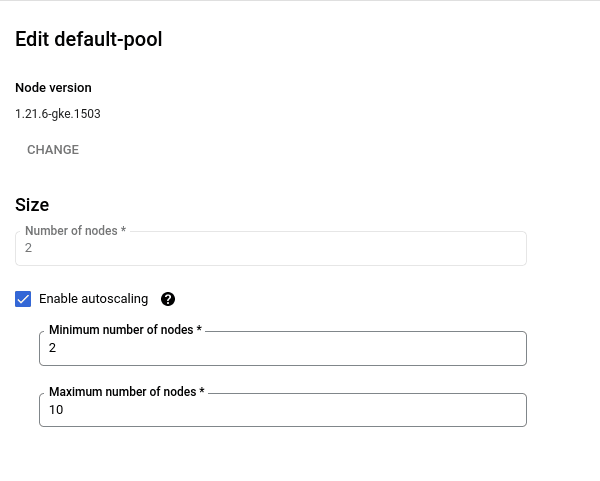
38)Navigate to clustrer. Click on the “test”.
39) Select nodes. Click on “default-pool”.
40) Click on edit. Enable autoscaling.
41) Specify minimum and maximum nodes. Save.
ArgoCD Setup
ArgoCD is a continuous delivery tool that implements GitOps, a declarative approach to managing Kubernetes applications. GitOps is a way to manage Kubernetes applications by using Git as the single source of truth for the desired state of the application. ArgoCD watches the Git repository for changes and automatically updates the Kubernetes cluster to match the desired state.
The Argo CD Operator manages the full lifecycle of Argo CD and its components. The operator’s goal is to automate the tasks required when operating an Argo CD cluster.
Install ArgoCD CLI: -
ArgoCD CLI Installation Document
CMD: -
- curl -sSL -o argocd-linux-amd64 https://github.com/argoproj/argo-cd/releases/latest/download/argocd-linux-amd64
- sudo install -m 555 argocd-linux-amd64 /usr/local/bin/argocd
- rm argocd-linux-amd64
Install Argocd In the cluster
Github link Argocd installation in the cluster
CMD: -
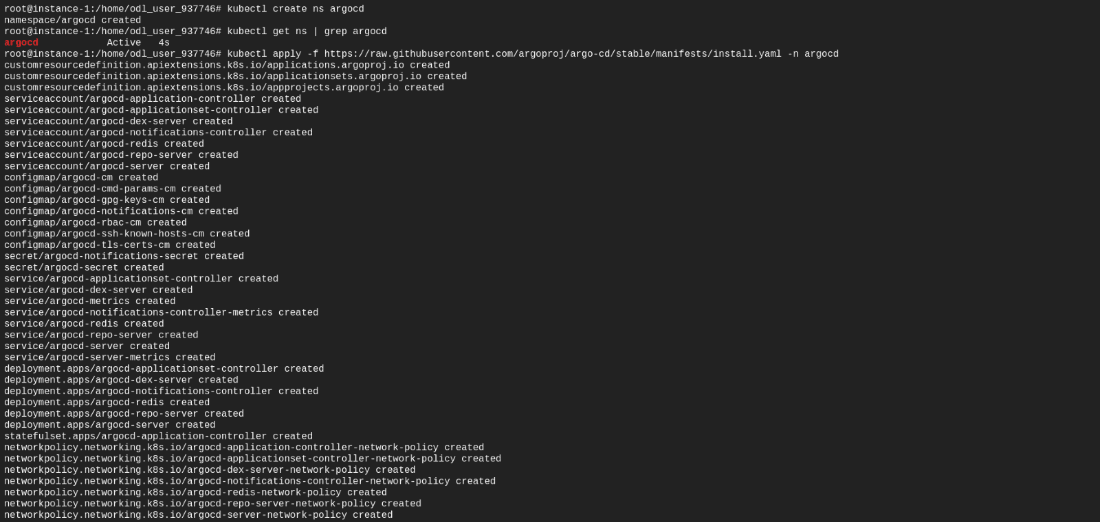
- kubectl create ns argocd
- kubectl apply –f https://raw.githubusercontent.com/argoproj/argo-cd/stable/manifests/install.yaml -n argocd
- kubectl get all –n argocd
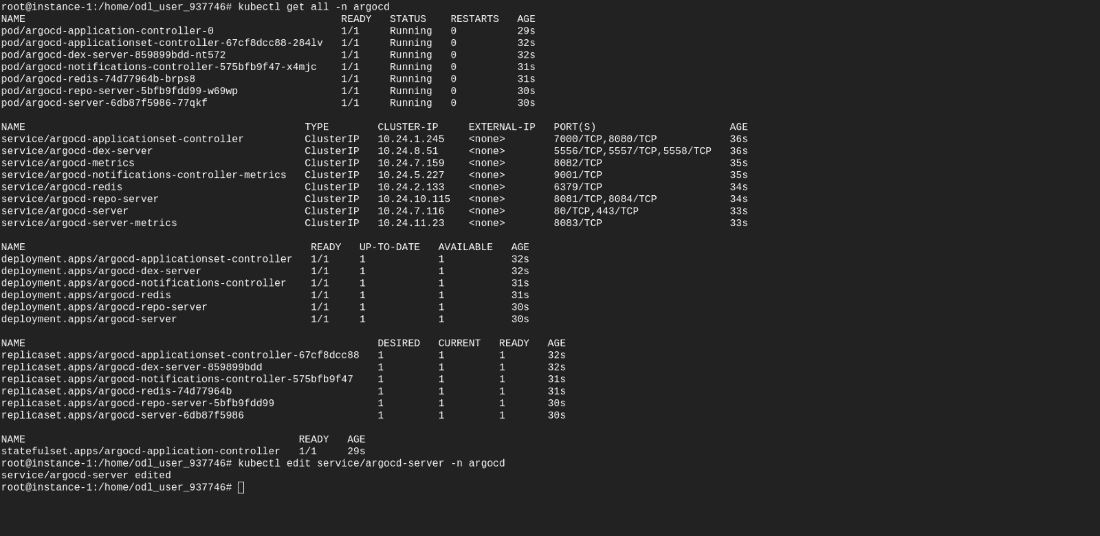
4) Edit the argocd server svc with clusterip to load balancer
CMD: -
1) kubectl edit svc argocd-server –n argocd

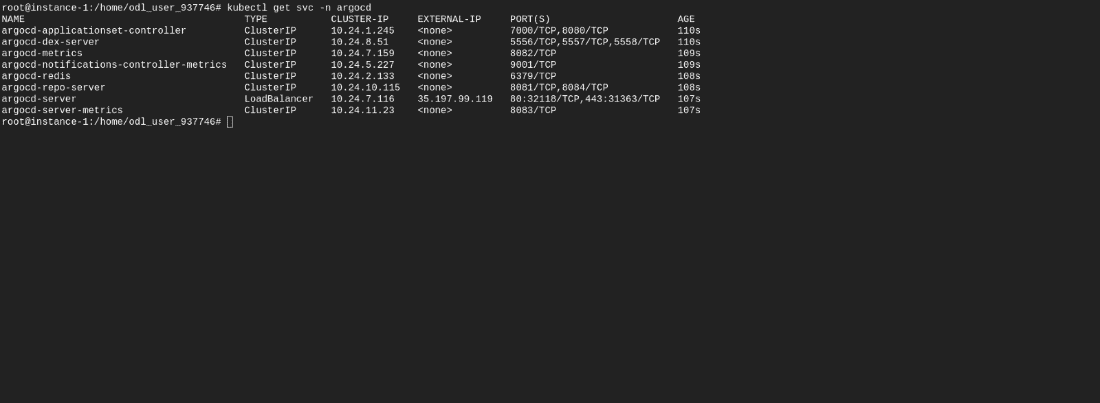
2) Check whether load balancer came up by using below cmd
CMD: -
1) kubectl get svc –n argocd
5) Login to argocd for getting argocd password use below cmd
CMD: -
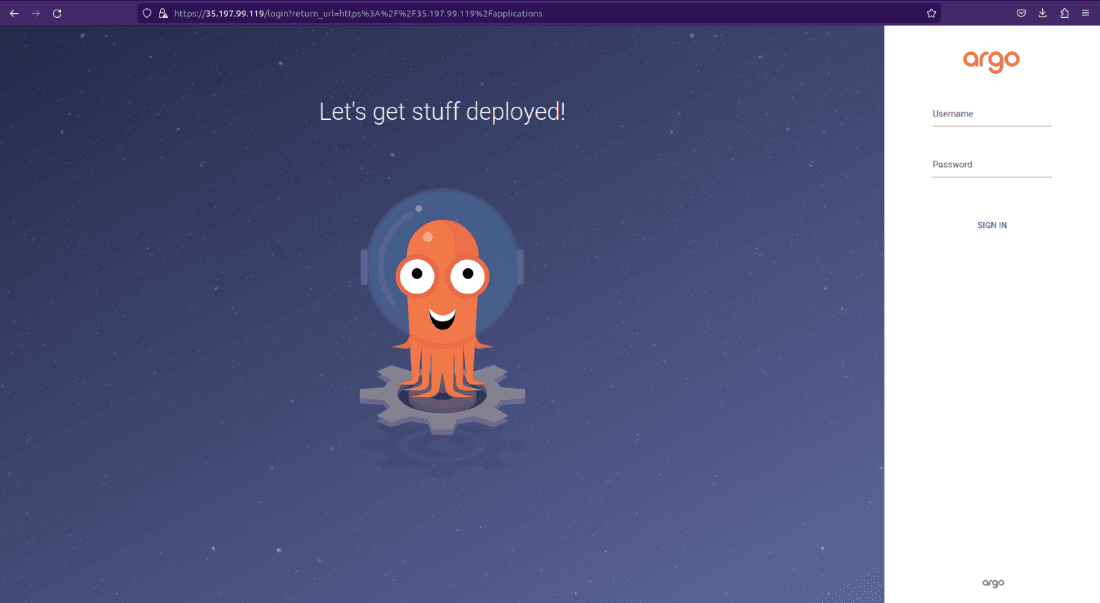
1) kubectl -n argocd get secret argocd-initial-admin-secret -o jsonpath='{.data.password}' | base64 –d

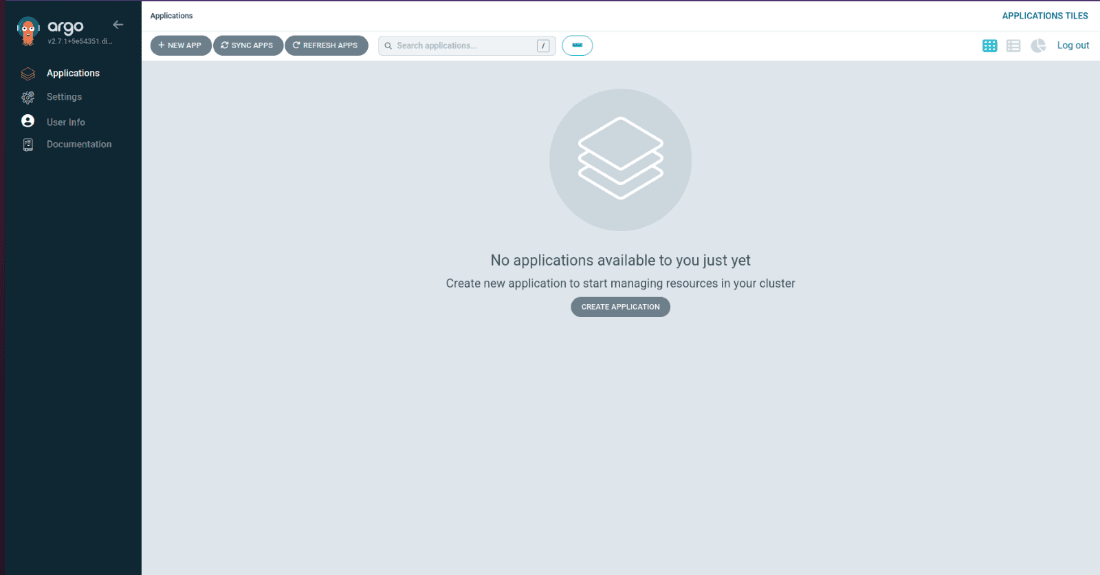
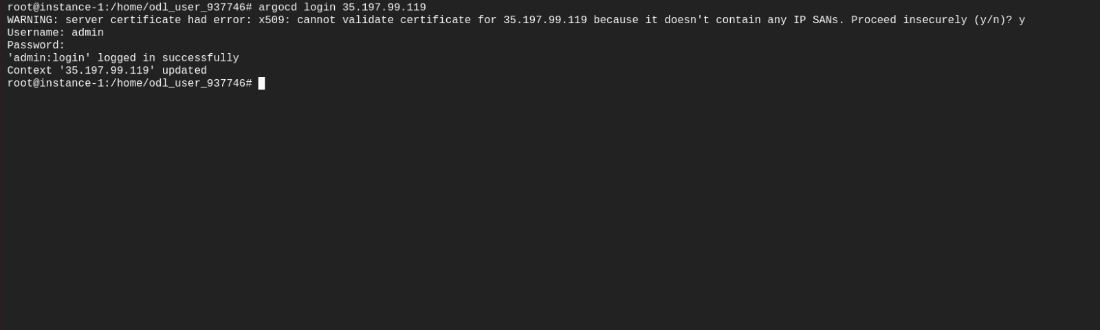
Login Argocd CLI using below CMD
CMD:
1) argocd login
Create a basic application in Argo CD
6) Go to Argocd Web UI
7) Click Create Application
8) Give Application Name
9) Select the Project Name
10) Select the Sync Policy
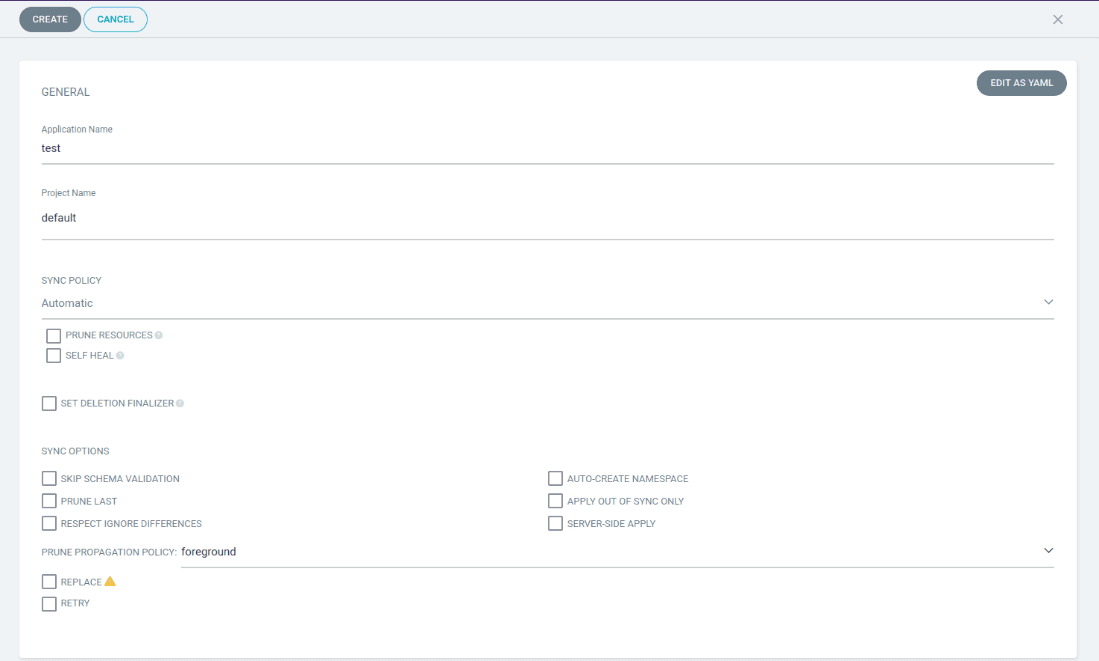
11) Provide GitHub Repository URL Where deployment and service were presented
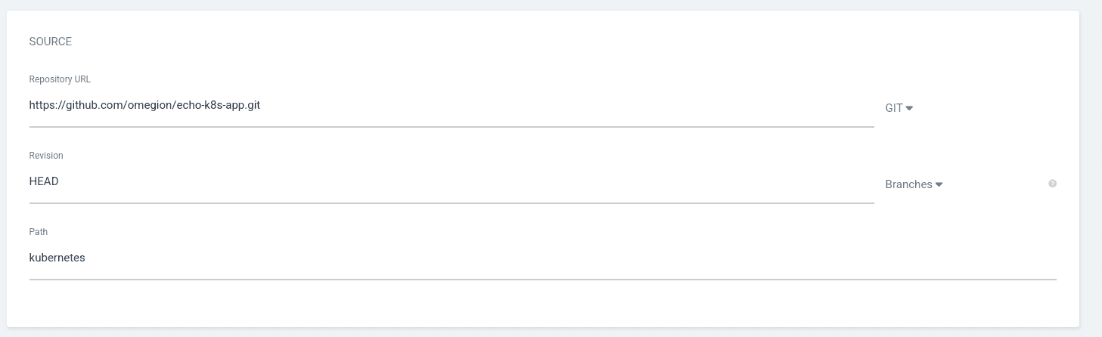
12) In Source Provide
13) Repository URL
14) Revision
15) Path
16) Destination URL
17) Provide Cluster URL
18) Namespace
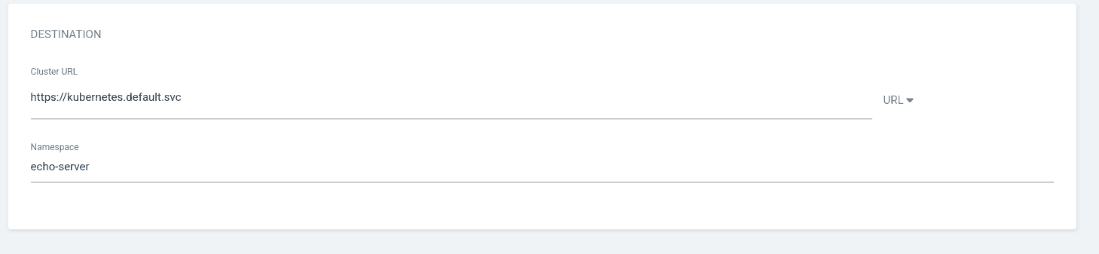
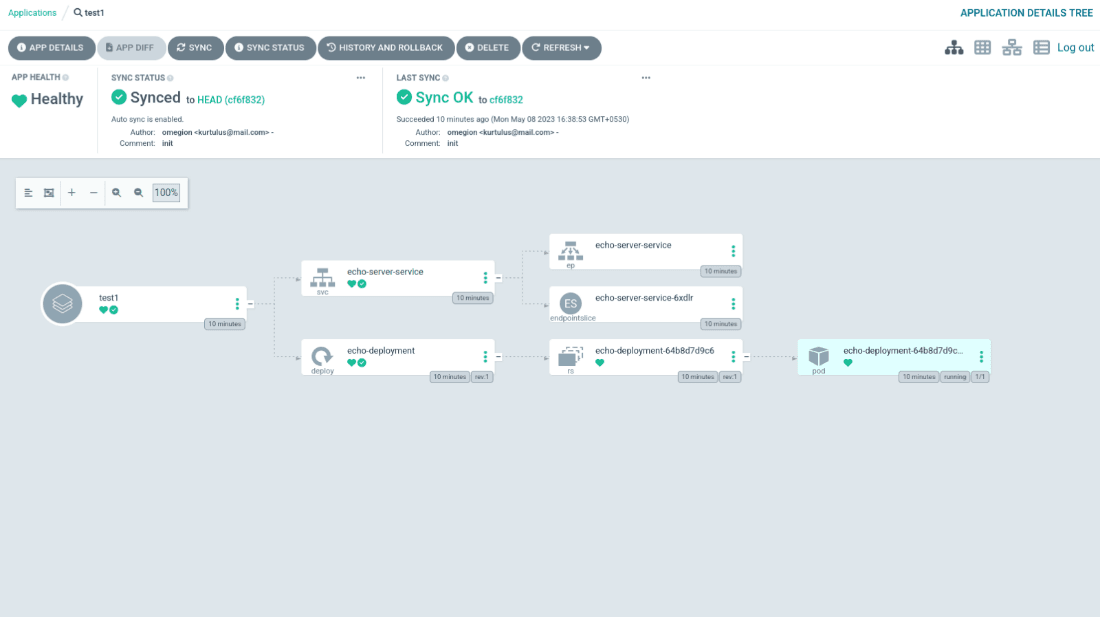
19) Click Create
Embracing Seamless Automation with Jenkins and Argo CD for Kubernetes
Implementing a robust CI/CD pipeline for Kubernetes applications can be a game-changer, streamlining the development, testing, and deployment processes. In this comprehensive guide, we've explored the dynamic synergy between Jenkins pipelines and Argo CD, offering a roadmap to transform your Kubernetes deployment experience.
Harnessing Jenkins Pipelines' Power
Jenkins Pipelines, with its declarative syntax and versatile features like staged execution and parameterization, empowers teams to construct intricate CI/CD workflows. Its ability to break down processes into manageable stages and execute them in parallel enhances efficiency and scalability.
Unlocking Consistency with Argo CD's GitOps Approach
Argo CD's GitOps-based delivery methodology ensures consistency and reliability in Kubernetes deployments. By syncing application states with Git repositories, it establishes a single source of truth, automating updates and maintaining the desired application state within the Kubernetes cluster.
Step-by-Step Guidance for Seamless CI/CD Integration
Our guide provided a comprehensive, step-by-step walkthrough—from setting up Jenkins on a Windows server to integrating SonarQube for code analysis, building Docker images, and deploying applications to Kubernetes using Argo CD. Each stage was meticulously detailed, enabling a smooth end-to-end CI/CD pipeline setup.
Optimization Strategies and Best Practices
In addition to the technical setup, we emphasized optimization strategies and best practices. These guidelines ensure the efficiency, scalability, and security of your CI/CD pipeline, keeping you ahead in the ever-evolving landscape of Kubernetes application deployment.
Looking Ahead
As technology continues to evolve, embracing automation tools like Jenkins Pipelines and Argo CD becomes pivotal in streamlining the software development lifecycle. By embracing these technologies and methodologies, teams can foster innovation, drive consistency, and accelerate their journey toward efficient and reliable Kubernetes deployments.
Conclusion
The integration of Jenkins Pipelines and Argo CD presents a formidable duo in the realm of CI/CD for Kubernetes. This blog aimed to demystify their implementation, offering a comprehensive guide and best practices to facilitate a seamless transition toward automated and efficient application deployments in Kubernetes.
By implementing these strategies, teams can bid farewell to manual deployment hassles and embrace a future where automation paves the way for innovation and reliability in Kubernetes application management.